Showing posts with label embroidery stitch tutorial. Show all posts

Friday, January 16, 2026

Four sided stitch tutorial | How to do four sided stitch? Picture tutorial

 Hi all

Hope all are doing well and good. Today I am going to share the tutorial for doing four sided stitch.

This is a pulled thread stitch.  It consists of horizontal and vertical stitches. It forms a square on the front side of the fabric and crosses in the reverse side.  This stitch formed a nice border. It can be done as a row or we can form squares or rectangles according to the number of stitches done. I am working over three threads on Aida fabric.  

Bring the needle up at one point and bring down straight above over three threads. Pull through the thread. A straight stitch is formed.

Bring the needle diagonally up crossing three threads. And bring down at the starting point.  Pull through the thread. Second straight stitch is done and we have formed two sides.

Again bring the needle diagonally up and bring it down at the end of the first side.  Pull through the thread and third side is formed.

Again bring the thread diagonally up and bring it down at the starting of the third side. Pull through the thread and fourth side is formed.

Now we have done with a four sided stitch.

For the second stitch, again bring the needle diagonally up and bring it down horizontally.  Continue like the first stitch. 

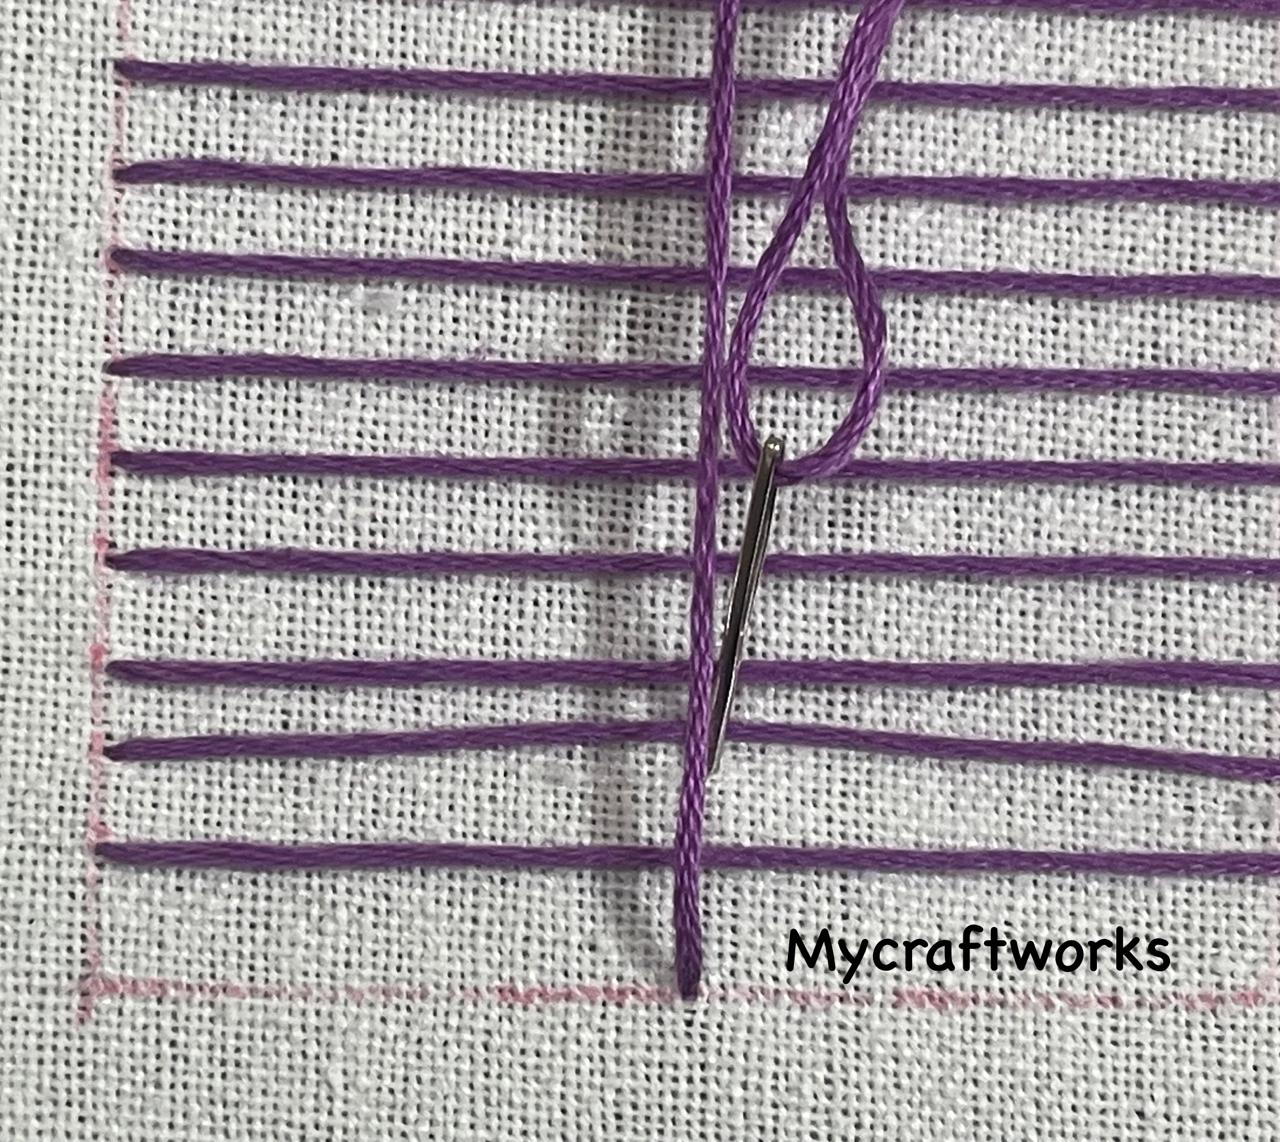
After doing with one row or enough number of four sided stitches, turn the fabric 90 degree clockwise. The picture is shown below.


Again bring the needle diagonally up and make a horizontal straight stitch and continue as shown in the picture’s below.


After doing the second side, again rotate the fabric 90 Degree clockwise and continue.


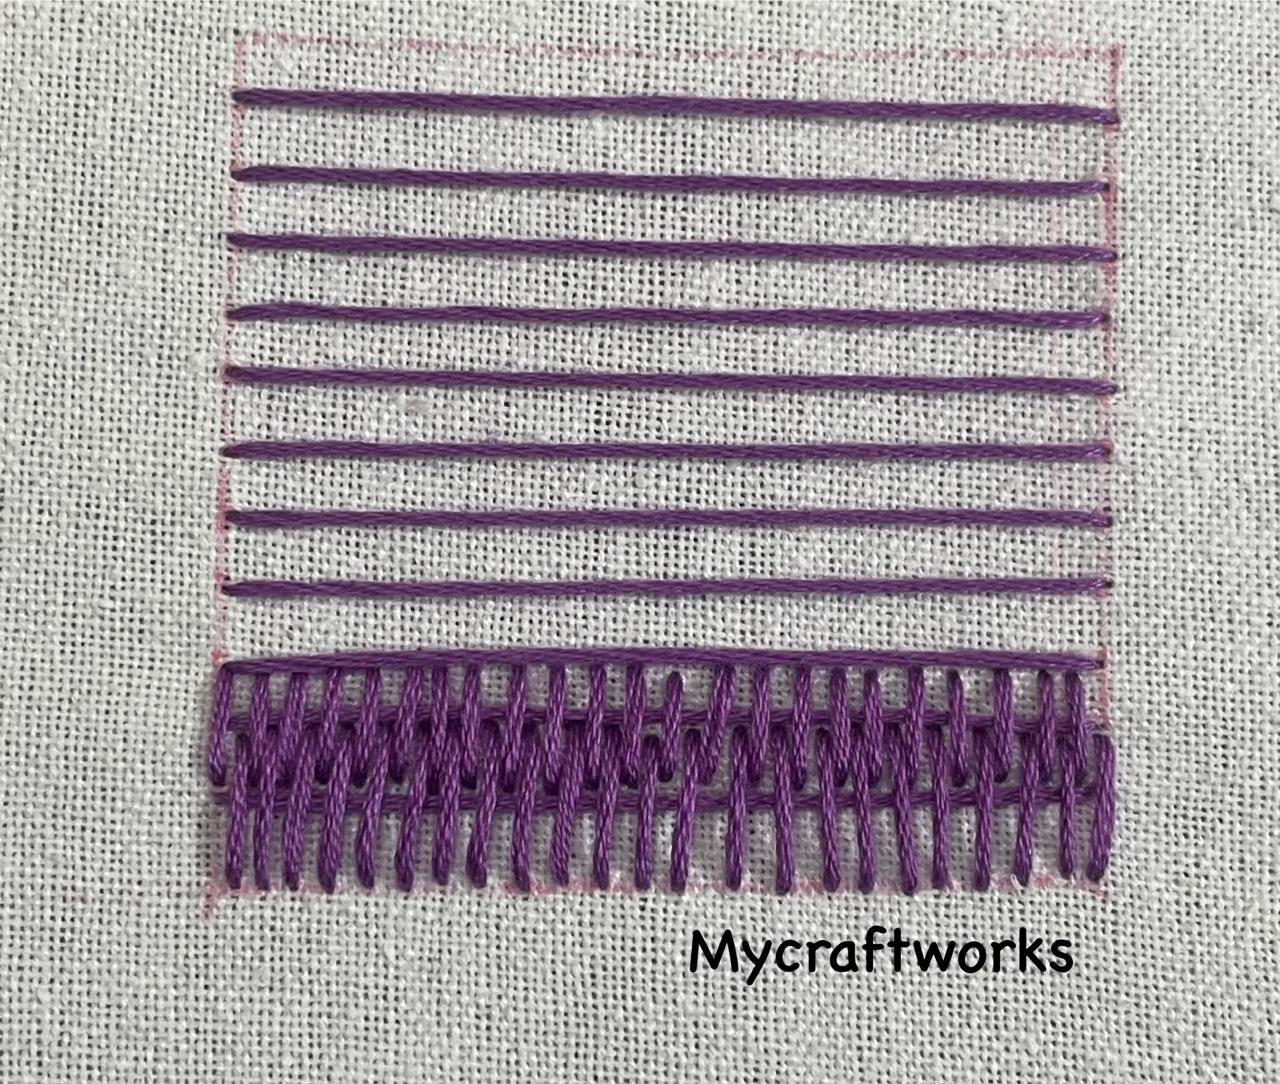
Now we have a square with four sided stitch.  

This is the back side of the fabric.  If done correctly we will be having squares in the back side.


Hope you find this tutorial useful.  I will be posting the video tutorial soon.  Till then have a happy time with your needle and thread.

Tuesday, November 12, 2024

Learn Burden Stitch - Video Tutorial, How to do burden stitch in hand embroidery

 Hi all

Hope all are doing well and good.  Today I am happy to share with you the video tutorial for burden stitch.  You can see the picture tutorial here.


Video Tutorial Below

Hope you all have found this video useful.  See you with a design using this stitch.  Till then have a nice time with your needle and thread. 

Monday, November 11, 2024

Burden Stitch - Embroidery stitch picture tutorial, How to do burden stitch in hand embroidery

 Burden Stitch comes under the family of couching in hand embroidery.  It is a filling stitch.  It takes brick like structure after completion.  It adds wonderful texture to the fabric.  


1)  I am working on a 2.5" square area to explain this stitch. Divided the square parallelly in every 0.20" to get uniformity.


2)  Make parallel straight stitches - they are known as laid stitches,  working from left-right and right-left alternately. 
To get neat stitches, I have started from the centre. You can start from left or right also.  Bring the needle up through the fabric in the base line.  

3)  Bring the needle back down below the horizontal stitch two rows above.  Pull through the thread to the back.

4)  You will get a straight stitch that couches the laid stitch.

5)  Now bring the needle up above the horizontal laid stitch in the second row, adjacent to the first stitch.

6)  Bring the needle back down below the horizontal stitch two rows above as shown.  Pull through the thread to the back.  You will get another straight stitch adjacent to the first stitch

7)Repeat steps 2-6 to the right side. 


8)Below is a picture with burden stitches to the right side.  Bow repeat the same on the left side.

9)First set of burden stitches complete. 

10) Here you can see second row is completed fully.  First and third rows are partially filled.
For the second set of stitches, start from the third row above the laid stitch and continue steps 2-6.  From here you can make adjacent stitches working three rows at a time or you can work to fill the gaps working two rows at a time.  


11)The picture below shows working adjacent burden stitches involving 3 rows.

12)The picture below shows the working involving two rows (alternate stitches are done).  I prefer this way.

13)Continue working to fill the fabric area.  You can change colors also.  I have used 3 colors in this work.  

14)When you reach the end you can see the top and base part are partially filled.  you can make straight stitches above the first laid stitch alternatively which completes the burden stitch in the top.  

15)Similarly fill the base part working straight stitch below the last laid stitch alternatively which fills the marked area completely.  And the beautiful burden stitch is ready.  


You can work burden stitch to fill any shapes.   Do include this stitch in your embroidery projects and have fun.  

See you soon with the video of this stitch.  Till then, have a nice time with your needle and thread.

Wednesday, July 3, 2024

Buttonhole Bar Stitch video Tutorial

Today I am happy to share with you the video tutorial for buttonhole bar stitch.  


Video 👇👇

The Picture tutorial can be found here.

Hope you find this tutorial useful.  Do try it and share your feedbacks in the comments.  

Have a nice day and have a happy time with your needle n thread.

Tuesday, July 2, 2024

Buttonhole Bar stitch tutorial

 Hi all

Today I am happy to share with you the stitch tutorial for "buttonhole bar". 


Let's move on to the tutorial

1)  First make 2-3 straight stitches as a foundation for this stitch.  I have made 3 here and the stitches are 2 cm long.

2)  Bring the needle up at one end and without picking the fabric pass the needle below the foundation stitches and make a blanket stitch.  We can make blanket stitches above/below.

3)One blanket stitch is made.

4) Continue doing blanket stitches till you cover the foundation stitches. The picture below shows the stitch halfway through.

5)  Anchor the last stitch at the end of the foundation stitches.  

6)  Buttonhole bar stitch is made.  It looks like cast on stitch.  Here I have made 3 buttonhole bar stitches. 

You can view the video tutorial here.

Hope you find this tutorial useful.  

Have great day.  Happy embroidering. 


Monday, August 7, 2023

Back stitched herringbone stitch - Embroidery stitch video tutorial

 Hi all

Today I am happy to share with you the video tutorial of a variation of herringbone stitch.  It is back stitched herringbone.  This stitch combines both back stitch and herringbone stitch.  


Video tutorial 
———————

Hope you will all like this stitch video.  I will be back with a Kutch work design in my next post.  Till then have a nice day with your needle and thread.

Wednesday, July 6, 2022

Open Chain Stitch - Embroidery Stitch Tutorial

 Hi all 

Hope all are doing well and good.  Today I am going to share the tutorial for doing the Open chain stitch.  This stitch belongs to chain stitch family

 Let's move on to the tutorial.

This stitch is done between two parallel lines. It is worked from right to left. I am doing it in 14 ct aida cloth here.  I am working it between 4 holes.  

Bring the needle up at one point at the lower stitch line.  Insert the needle in the upper stitch line and bring it up on the lower line at an angle.  The working thread should be below the needle.   


Pull through the thread.  Don't tighten the thread.  
when there is a some amount of thread remain insert the needle in the top line aligning the thread that comes up previously.  

Now tighten the thread by pulling the working thread.

Angle the thread again at the base line with the working thread below the needle.  

Pull thread thread and before tightening the thread insert the needle at the upper line and then tighten the thread as we do before. 

Continue the same steps along the stitch lines.  When you reach the last stitch leave some thread.

Insert the needle in the upper line and tighten the thread.  

To finish off, Remove the needle and insert it outside the lower stitch line 

Pull through the thread and bring the needle again in the upper line inside the last chain.  Hold the last chain with the left hand so that it does not get tighten.  Pull through the thread.

Insert the needle outside the last chain in the upper stitch line and anchor it.

A line of open chain stitch is formed.  

Hope you find this tutorial helpful.    In my next post I will show an embroidery design.  Till then, happy embroidering and have a nice day. 
*/