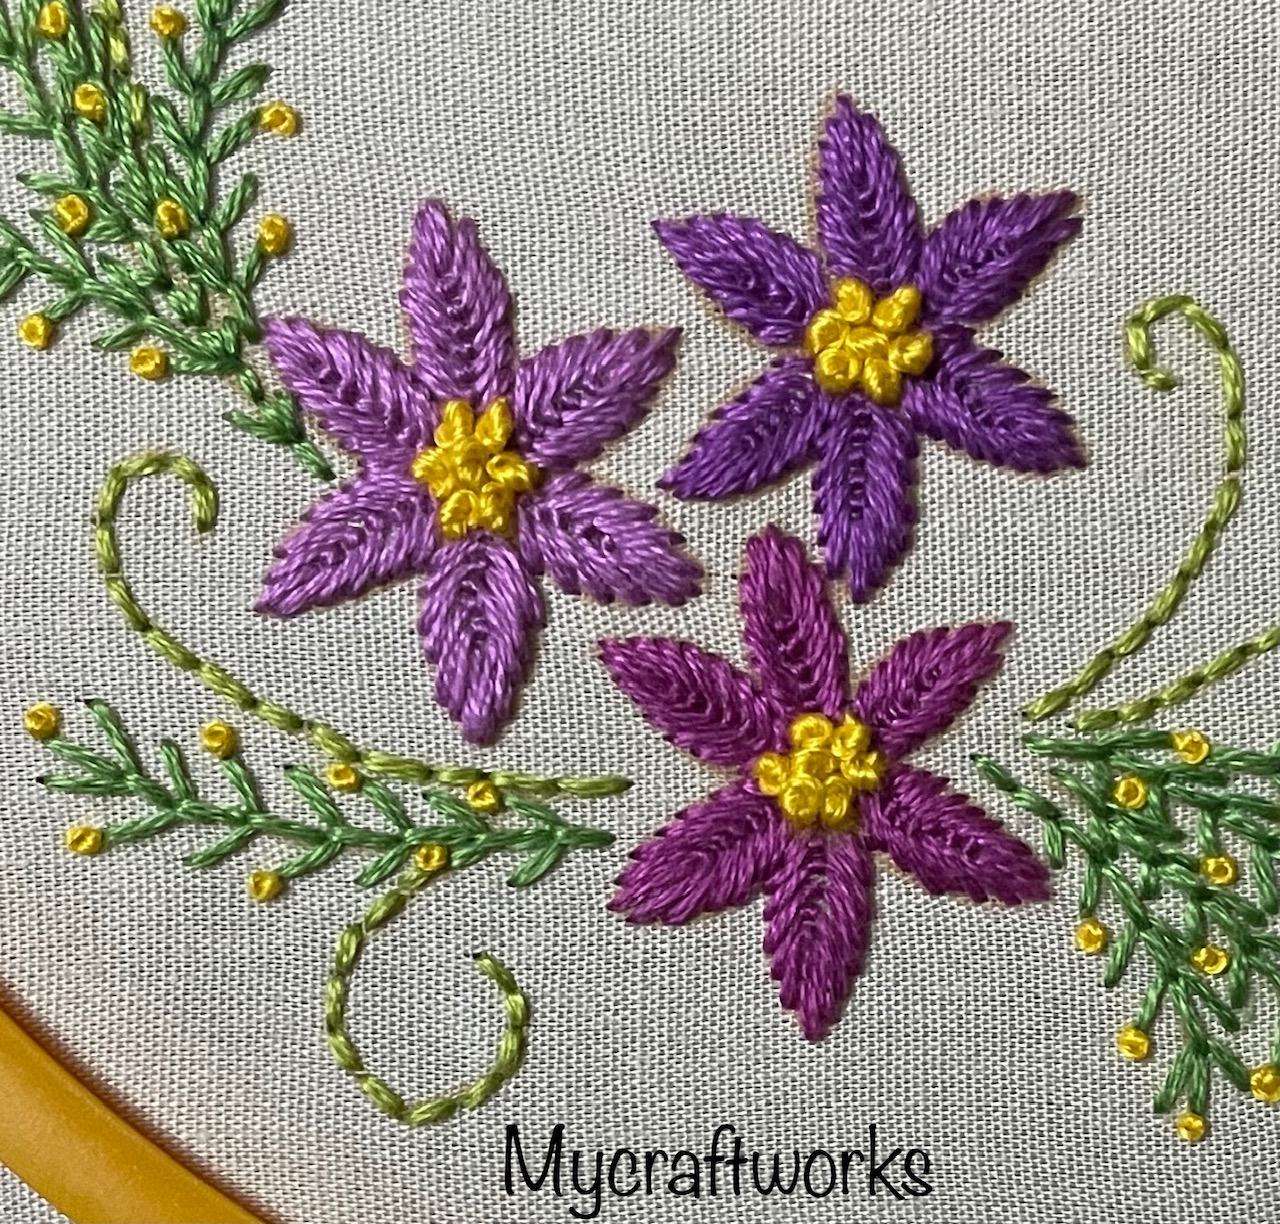
Thank you for joining me once again as we explore our tenth flower design — the elegant Knotted Blanket Stitch Flower. This beautiful variation of the blanket stitch combines neat knots with decorative petals, creating a flower with wonderful texture and dimension. It may look intricate, but it's easy to learn when you follow each step. Watch the video tutorial below and discover how this unique stitch can add a beautiful handcrafted touch to your embroidery projects.
In between petals - Pistil stitch - 27 - 6 strands, 1 wrap
Centre of flower - French knots - 27 - 6 strands, 2 wraps
Stem - Back stitch - 227 - 3 strands
Leaves - Herringbone stitch - 227 - 3 strands
Congratulations on completing your Knotted Blanket Stitch Flower! 🌸 The combination of blanket stitches and delicate knots creates a flower that is both eye-catching and elegant. With every new stitch you learn, your embroidery skills continue to grow, opening up endless creative possibilities. I hope this design inspires you to experiment and create beautiful floral patterns of your own.
I’m happy to have you here again as we move on to our ninth flower design — the beautiful Herringbone Stitch Flower. This stitch creates lovely woven petals with a soft textured look, making the flower appear fuller and more decorative. It’s a simple technique that adds elegance and creativity to your embroidery projects. Learn how to stitch this charming flower in the video tutorial below and continue filling your embroidery garden with beautiful blooms! 🌼✨
Your Herringbone Stitch Flower is now complete, with its woven petals adding texture and beauty to your fabric. It’s wonderful how different stitches can create such unique floral effects. Keep practicing and combining these flowers to create your own colorful embroidery designs.
I’m happy to have you here again as we begin our eighth flower design — the Long Tailed Lazy Daisy Flower. This variation of the lazy daisy stitch adds longer, flowing petals that give the flower a soft and elegant look. It’s simple to stitch yet creates a beautiful floral effect that stands out on any fabric. Learn how to make this lovely design in the video tutorial below and add another graceful bloom to your embroidery garden!
Our Long Tailed Lazy Daisy Flower is now complete, with delicate petals that add movement and charm to your embroidery. This stitch is perfect for creating floral sprays, borders, and elegant motifs with ease.
Hope all are doing well and good. I am happy to share with you an embroidery wreath design that uses Granitos stitch. It fits a 5" hoop perfectly. Already I have posted a small flower design.
I am on youtube now in the name "Embroidery stitches and Tutorials". I am presenting all the stitch tutorials as a video, compiled from the pictures used in the blog. Instead of scrolling down the page you can see as a video there.
Hope all are doing well and good. Yesterday I have shared the tutorial for doing the wheatear stitch. Today I have posted a simple design to practice the same.
Pattern for the design
-----------------------------
I have used two shades of green for the stalks. Start with a straight stitch for the tip. Then proceed with the wheatear stitches till the 'v' shapes are drawn and the remaining part of the stalks are stitched with back stitch. I have used 4 strands of threads to do the wheatear and back stitch.
After completing the wheatear stitch I have added french knots in red and yellow at the tip of the wheat ears. I have used 6 strands of thread with 1 wrap. This is just a simple design to practice wheatear stitch.
Hope all of you like it. Tomorrow I will be back with a finished crochet square. Till then, have a nice day.
Hope all are doing great. Two days back I have posted the tutorial for doing Double Cast on Stitch. Today I am happy to share with you a design to practice that stitch.
For this design I have used pearl cotton threads. This is the first time I am using pearl cotton thread for doing surface embroidery. First let us see the stitched design.
Pattern for the design
------------------------------
The leaves of this design are stitched using fishbone stitch. First I have stitched the leaves and then moved on to stitch the flowers.
While stitching the flowers I have first made the double cast on stitch along the lines and then stitched another inbetween the lines. Then stitched french knots with 1 wrap inside the centre of the flowers. For the flowers and french knots I have used two strands of pearl cotton thread, for leaves one strand of thread is used.
For other stitch tutorials and designs click here. Tomorrow I will be back with a crochet mandala I have crocheted for my online store. Till then have a nice day.
Hope all are staying safe and doing good. I am here to share with you an easy pattern for practicing the berry stitch. You can view another design using the same stitch here.
Hope all are staying safe. In the embroidery design series, today is spider web stitch. You can find the tutorial for spider web stitch here. This stitch is easy with straight stitches and whipping up the straight stitches.
The design is for a 5" embroidery hoop with the word HOPE.
Hope all are doing well and good. In the embroidery design series today I am very much happy to share with you the design for practicing the satin stitch. It is a basic hand embroidery stitch which is commonly used to fill shapes. It is also known as Damask stitch.
The design I have posted today is a small design when worked with satin stitch gives soft surface. It is very easy to do. Tomorrow I will be posting the tutorial for doing satin stitch and the tricks I follow while doing it. We will see the design and pattern for it.
Pattern for the design
---------------------------------
Both the flowers and leaves are done in satin stitch and the curls are done in back stitch.
Anchor thread numbers
Flowers - 328(2 strands)
- 9(2 strands)
Leaves - 257 (2 strands)
Curls - 228 (3 strands)
Hope all of you like this design. You can view my other embroidery stitches with its designs here. Tutorial for satin stitch is here.. Till then, have a nice time with your needle and thread. Don't forget to drop in your feedbacks in the comments section. Do follow my blog for the more updates.
Hope all are staying safe. Today I am happy to share with you an embroidery design that uses the technique of weaving. I have learnt this stitch as kamal kadai stitch. But on the other hand woven trellis stitch also looks the same. I have done some projects on kamal kadai years back. You can see it here.
Kamal kadai stitch uses straight stitches. Then the straight stitches are weaved to form an woven effect. I will be posting the tutorial for this stitch tomorrow.
Let us see the design today.
Pattern for the design
-----------------------------------
Stitches Used:
Flowers - Kamal Kadai Stitch
Leaves - Fishbone stitch
Stem - Stem stitch
Centre of flowers - French Knots
Anchor Thread Numbers
Flowers - straight stitches - 292 (3 strands)
- Weaving stitches - 332(3 strands)
Leaves - 225 (3 strands)
Centre of flowers - 290 ( 6 strands, 1 wrap)
Tomorrow I will be posting the tutorial for doing kamal kadai stitch. Till then, have a nice day.
Hope all are doing well and had a great weekend. Today I am happy to share with you an embroidery stitch rose. The stitch I am talking about is cast on stitch. It is used in Brazilian embroidery and now a days it is used in most of the embroidery dresses designed in the boutiques. It will take some time to master the stitch and only during practice we can get the tips and tricks in doing the stitch. Back in 2019 I have practiced cast on stitch and you can view that flower here.
Today I will be sharing the design. I didn't draw the pattern for this design. Stitched the rose first and then randomly stitched the leaves. I have used tapestry needle to do this stitch. Usually chenille needles are used. Now onto the design.
I have used 3 shades of coral colours dark to light from inside out. For the leaves I have used straight stitches following the shape. You can use fly stitch also.
Hope all are doing great. I am sure you have like my previous pattern on kutch work. In January I have posted a small fly stitch flower design to practice. Again In my embroidery design series with various stitches, today I am happy to share with you a design that can be used for embroidery hoop wall hanging. I have drawn this design that fits a 5" hoop perfectly. Let's see the design now.
Hope all are doing well. I am happy to share with you a new embroidery design which uses the colonial knot stitch.
The stitch looks similar to french knot but the way we wrap the thread is a little different. Colonial knot looks somewhat raised than french knots. But some people say the other way. The difference between the two stitches is not that much seen but if observe closely the difference can be noticed by only those who know these two stitches.
I have used a simple design to work these stitches. You can also replace with french knots and the projects that uses french knots can also be replaced with colonial knots. Tomorrow I will post the tutorial for doing colonial knot. Now onto the design.
Hope all are doing well. Thanks for your response for my previous post. Today I am happy to share with you a new embroidery design that uses the coral stitch which is a very easy one.
Coral stitch can be used to stitch along the lines.Fancy and Perfect stitch for outlines It takes nice shape along the curves also. It belongs to the knots family of stitches. It looks like the knots are sitting next to each other. It is also known as German knot or snail trail.
Hope all are doing well. I have worked on a simple design using pistil stitch. It is also known as Long French knot stitch. If you are familiar in working the french knots then it is an easy job for you.
You can view my other free embroidery designs here.
Hope all of you like this design. Do give a try and let me know in the comments section. I will be happy if you send a picture of your worked design to shamiimmanuel@gmail.com.
Today I am here to share with you another simple design to practice a kutch work motif. It is formed using continuous diamonds which takes the shape of a cross. It is also known as maltese cross. In between the kutch motif I have added algerian eyelet stitch which can be done in straight stitches. Have a look at the design.
The outer two lines are done using running stitch.
Video tutorial for working this kutch motif
Pattern for this design
----------------------------------
Threads Used
-------------------------
Anchor embroidery threads- 3 strands
Orange - 324
Green - 227
I will come up with a tutorial to work this kutch work motif in my coming posts. For basic kutch work tutorials refer the links given below.
Hope all of you like this pattern. I will be working on a kurti neck design using this pattern. Will share it with when it is done. Till then, have a happy time with needle and thread.