Showing posts with label Shisha work. Show all posts

Friday, June 7, 2024

Kutchwork border design with mirror for beginners

 Hi all

Hope all are doing well and good.  Today I am happy to share with you another simple Kutch work design that can be used as borders.  This can also be used in the yoke part of a kurti.  You can also expand this design to make it as an overall design.  Hope you like it.


Video Tutorial

Pattern for the design 
——————————

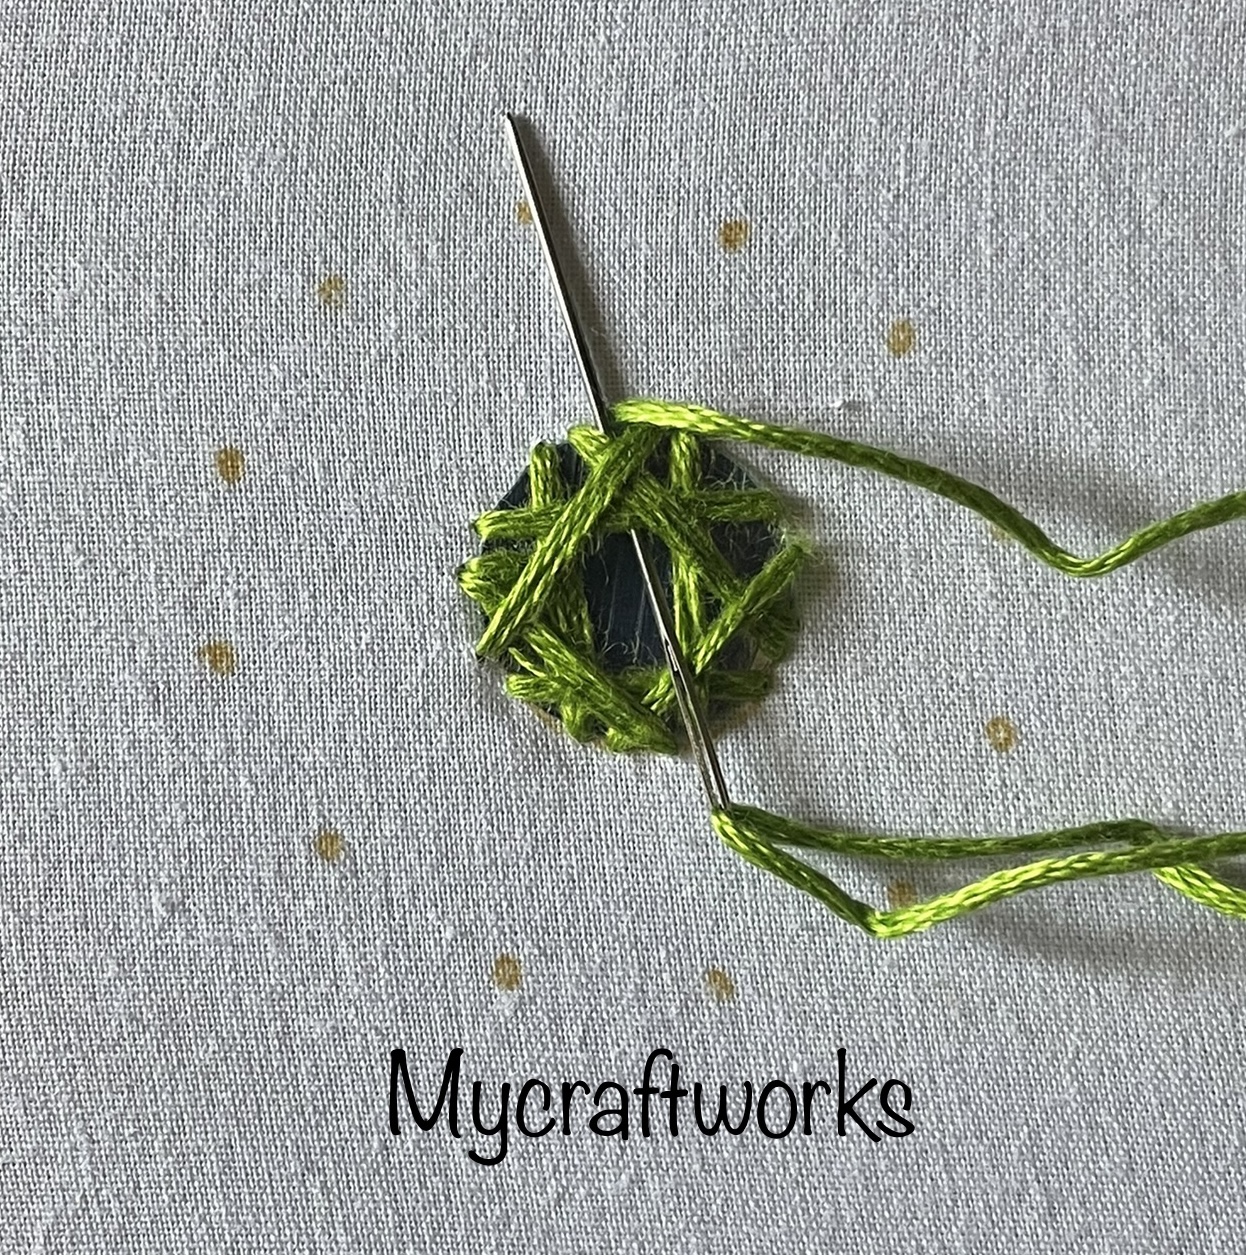
I have used 6 strands of thread to embroider this design.  You can use sequins or mirrors for the circle part.  

I am hoping that this design will be useful.  See you soon with another design.  Till then have a nice day.  Have a nice time with needle n thread.

Saturday, February 25, 2023

Mirror Work 9 with flower using lazy daisy stitch

 Hi all

Hope all are doing well and good.  Today I am happy to share with you a simple and easy mirror work that uses straight stitches to frame the mirror and lazy daisy stitches to form a flower shape.  Hope all of you will like it.  


Video Tutorial
------------------------

You can use this design as an all over design for your design for your sarees and kurtis.  Do give a try and drop in your feedbacks in the comment section.  

In my next post I will come up with a simple satin stitch flower video.  So do watch my space.  Till then happy embroidering and have a nice day.

Friday, July 22, 2022

Mirror Work 8 - Using straight stitches | How to embroider a circle using straight stitches

 Hi all

Hope all are doing well and good.  Today I am happy to share with you a simple and easy mirror work.   I am using simple straight stitches to frame the sequin here.  By using the straight stitches we can form a round very easily.  This method is very very useful for absolute beginners who wishes to embellish their dresses with mirrors or sequins.  

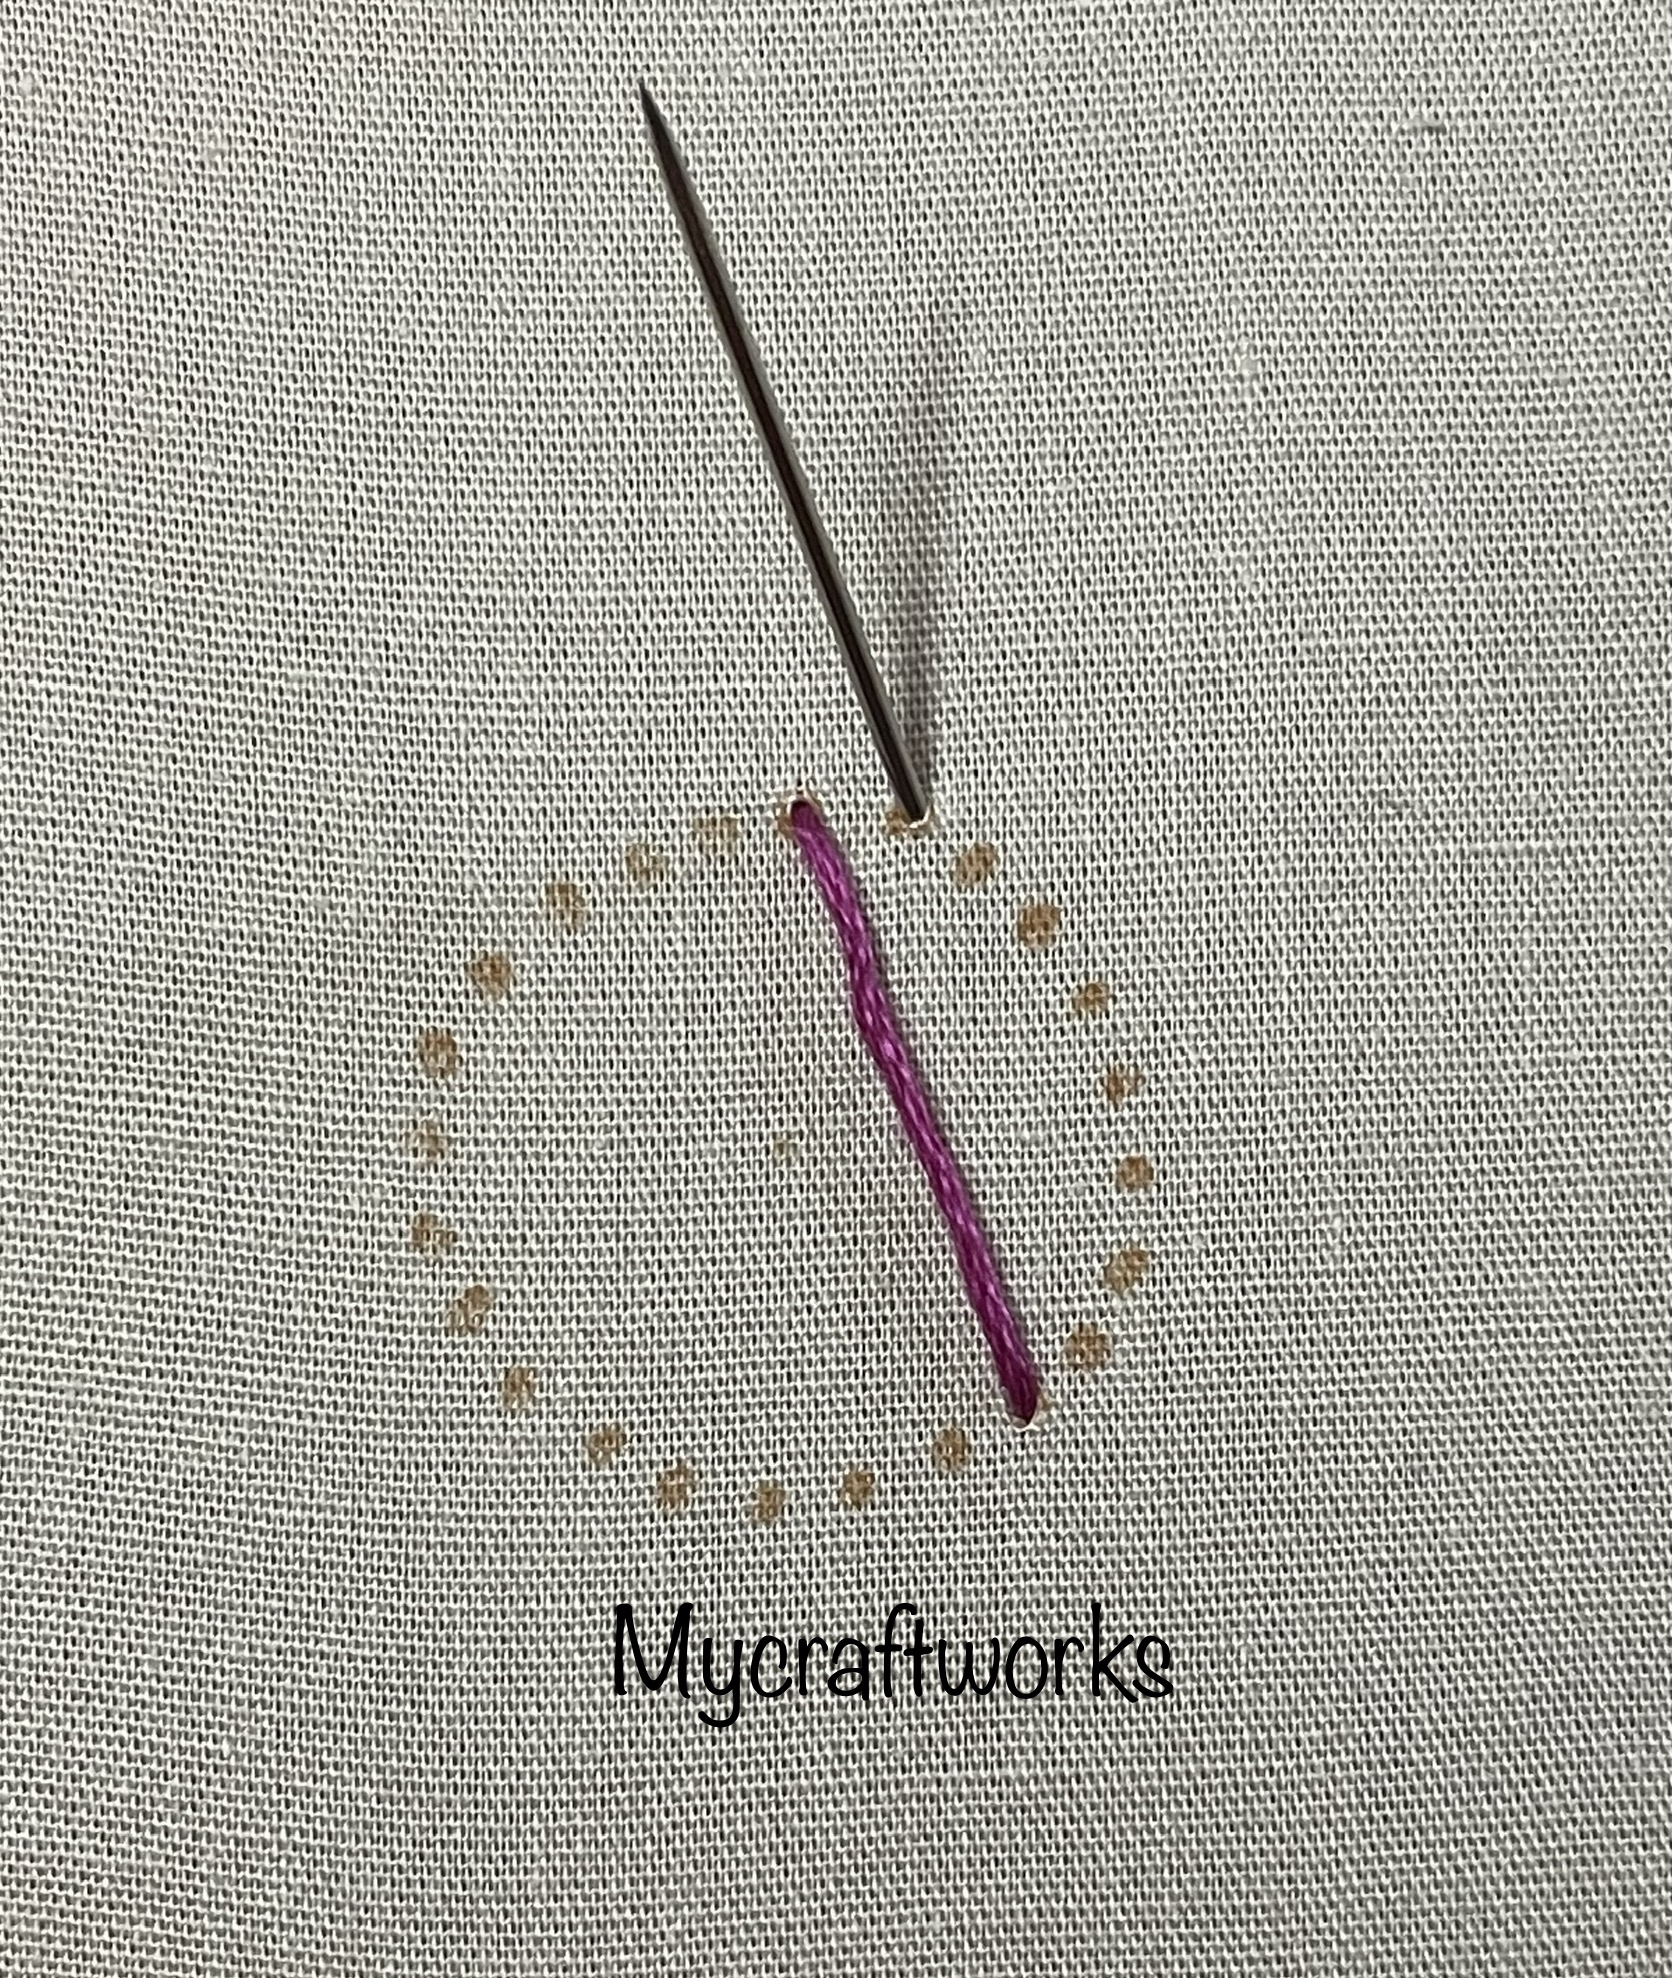
Let's move on to the tutorial.  For doing this work I have placed 24 equally spaced dots around 1" circle using the polar graph paper downloaded from here.  I have marked the dots in the second circle as you see below.


Trace these dots in the fabric and just make straight stitches as shown in the picture below. 

 You have  to make straight stitches between one dot and the 10th dot from that dot.  
i.e)  connect dots 1,10 using a straight stitch.  Then (2,11) (3,12) (4,13) (5,15) and so on.  

We have to bring the thread up at the 1 and go in at 10.  Like this we have to come up for all the 24 points and go in at the 10th point from where we come up.    So from each dots we will be having two straight stitches. 


Here I am using 6 strands of anchor embroidery threads.  So I have got a small space in the centre.  For the picture in the beginning I have used 4 strands of thread and got a little bigger space that fits a 3/4" sequin.  

If you are using 4 strands of thread paste the sequin or mirror first and then proceed with the straight stitches.  


For this space I have found a small mirror in my stash. You can purchase that size mirrors here.


You can use this mirror work to embellish your dresses like kurtis and sarees.  Hope all of you like this tutorial.  I will be back with my WIP update in my next post.  Till then have a happy time with needle and thread.  Have a nice day.  

Friday, June 3, 2022

Mirror Work 7 - using Cretan Stitch

 Hi all

Hope all are doing well and good.  Today I am happy to share with you another mirror work that has been done using cretan stitch.  


For this tutorial I have used a sequin.   I have drawn a circle around the sequin and from that circle and at a distance of 1 cm marked equally spaced dots. 

1)  Glue the sequin to the fabric or attach it to the fabric using small stitches using the holes on both sides of the sequin.


2)  Make base stitches using straight stitches.  


3)  Bring the needle up between any two dots near the sequin.

4)  Pass the needle below the base stitches from the centre of the sequin.  The working thread should be on the right side of the needle and pull through the thread firmly around the base stitches.

5)  Take a stitch from the dot that is to the right of the initial point.  The stitch should go in at the dot and come out in the midway of sequin and the dot.  Pull through the thread.  The working thread should be in the right side of the needle.

6)  Again pass the needle under the base stitches with the working thread under the needle.

7)  Take the next stitch from the next dot like as before and pull through.

8)  Continue the steps 7 & 8 in clockwise direction.  Anchor the thread in the first point where it comes up initially.  

9)  The sequin is beautifully framed using cretan stitch.

The following work is done with 24 dots equally spaced around the sequin .

Hope all of you found this tutorial useful.  I will be back with another interesting tutorial soon.  Till then have a nice day.  

Friday, March 4, 2022

Mirror work - 6 using lazy daisy stitch variation


Hi all
Hope all are doing well and good.  Today I am happy to share with you another mirror work done using lazy daisy stitch variation.  
Here I am using a 0.5" sequin. 


1)  Fix the sequin using glue or using the stab stitch through the holes in both sides of sequin.

2)  Draw a circle around the sequin with a gap of 0.5 cm from the sequin.

3)  Stitch two straight stitches vertically over the sequin.

4)  Stitch two horizontal stitches over the previous vertical stitches.

5)  Bring the needle up near the sequin.

6)  Pass the needle under the base stitches and pick up a small length of fabric near the outer circle with the working thread over the needle .

7)  Pull through the needle.  First stitch is made.

8)  Bring the needle up next to the first stitch and repeat the same.

9)  Pass the needle under the base stitches and pick up a small length of fabric near the outer circle.

10)  Loop the thread over the needle.

11)  Pull through the thread and anchor the stitch outside the stitch as we do for lazy daisy stitch.

Repeat steps from 8 around the sequin.

The mirror is beautifully framed.  

Tuesday, December 28, 2021

Long tailed Daisy mirror work - Video tutorial

 Hi all 

Hope all are doing well and good.  Today I am happy to share with you that I have added a video tutorial in my channel for doing mirror work using long tailed daisy stitch.  In my last blog post I have given the picture tutorial.  you can view it here.  You can see the video tutorial below.


Dear readers, if you like my videos kindly subscribe my channel and press the bell icon to receive the notifications when I publish a video.  

In my next post I will come up with a crochet finish.  Till then, have a happy time with your needle and thread.  

Saturday, December 25, 2021

Mirror Work - 5 using Long tailed Lazy Daisy Stitch

 Hi all

Merry Christmas to all of you.

Hope all are doing well and good.  It's been more that a week I have posted here.   So today I am happy to share  with you another mirror work using the simple lazy daisy stitch.  

Fix the sequin using a small stab stitch on the holes on both the sides of the sequin.
  You can also fix it using glue. 

Stitch a round of chain stitch around the sequin. Try to keep the number of chains even. 

Make a round of buttonhole stitches through the chain stitches.  Tutorial is available here. 

Now Bring the needle through any one chain stitch.

The above photo is rotated here. 
 Make a long tailed Lazy daisy stitch through the chain where the needle comes out. 

Anchor the tail a little slanting to the right as show above.

Make the next long tailed lazy daisy stitch in the next stitch.
Anchor the tail a little left (i.e - at the point where the first stitch is anchored)

This is how it looks like. 

Do the next set of long tailed lazy daisy stitch in the next two chain stitches.

Do the long tailed lazy daisy stitches around.  

Embellished the mirror work using cut beads and small glass beads. 
You can use this as an all over design for your dresses.  
*/