Showing posts with label Reverse Chain stitch. Show all posts

Monday, October 19, 2026

Easy blanket stitch flower embroidery for sarees and kurtis

 Hi all

Hope all are doing well and good.  

Whenever I think about creating a new embroidery design, it is only floral patterns that draw me in. Flowers are something that have always been attractive to me. 

 This time, I’ve come up with a simple floral design. It can be embroidered as individual, standalone motifs scattered across a saree.  If you create this design in a continuous, slanted pattern, you will get a neat and simple border design.


Video tutorial below 


Pattern for the design
-----------------------
This design fits a 11 x 7 cm box

I have used simple stitches and minimal colours for this design.  Beginners can do it easily.  

Stitches Used
Flowers - Buttonhole stitch starting from same point - 3 strands
Stems and curling tendrils - Reverse chain stitch - 3 strands
Leaves - Satin stitch - 6 strands
Added a half pearl bead in the centre of the flowers.  

I hope you all like this design. I will see you again with another Kutch work design.  Till then have a nice time with your needle and thread.

Wednesday, August 18, 2021

Cushion Cover design

 Hi all

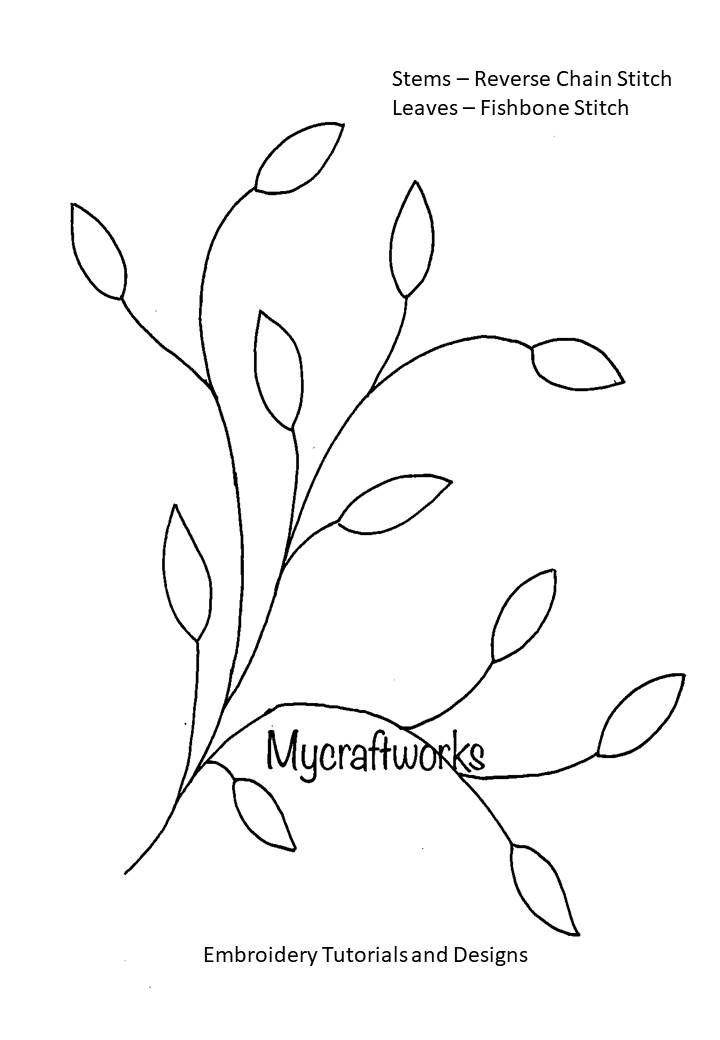
Hope all are staying safe and doing well.  Yesterday and day before yesterday I have posted the tutorial for Reverse chain stitch and fishbone stitch. Today I have come up with a design to practice those two stitches.  

Here is the video tutorial on making this embroidery

Pin this image to your pinterest board

This is a simple design that can be stitched for beginners also.  This design fits well for the centre of a cushion and it can also be extended to fit the whole cushion.  Now onto the design.


Embroidery is done on the green colour poplin fabric.  
Anchor embroidery threads of numbers 255(green) and 47(red) are used.  
4 strand of threads are used throughout the embroidery.  

Pattern for the design
--------------------------------
 I have posted a video on making of this design.  If you are interested you can have a look at that here.

Hope all of you like this design.  Tomorrow I will be back with another interesting post.  Till then, have a nice day.  

This post has been linked to the following link parties

Monday, August 16, 2021

Reverse Chain Stitch Tutorial with Video

 Hi all

Hope all staying safe and doing good.  In my embroidery stitch tutorial series next comes the 'Reverse Chain Stitch'.  It is same as chain stitch but done in the reverse direction.  Usually chain stitch is done fro bottom to top in a stitch line or we will hold the design upside down to do the chain stitch.  But in reverse chain stitch it is stitched from top to bottom.

Pin this image for your future reference

This is first time I am making a video tutorial for a stitch.  Kindly watch it and give me your feedbacks.  Kindly subscribe and keep watching.
 
Now we will see how to do the reverse chain stitch.  
1)  Start with a lazy daisy stitch/detached chain stitch

2)  Bring the needle up through the fabric a little below the first stitch.

3)  Insert the needle under the first stitch without picking the fabric.

4)  Insert the needle in the place where you come up.

5)  Repeat the steps 2-4 along the stitch line.

6)  A line of reverse chain stitch.  

I have worked the letter 'S' with reverse chain stitch with a lazy daisy stitch flower. 

Hope this tutorial is useful to you.  Tomorrow I will come up with another stitch tutorial.  Till then, Have a nice day.  
*/