
You need a wooden frame like the one
in the picture to do the wollen mat.

Now start winding the wollen yarn . For that tie a knot with the yarn in the nail marked as 1. Starting from 1 wind the thread around i.e) from 1 come to nail ' a ' in the opposite side and then to nail '1'. This is 1 round of winding. Like this do 5 times or 8 times . The more u wind u will get a puffy mat. Zoom the picture to get a clearer image with markings.
Now leave the next nail and start winding the nails '3' and 'c'. Don't cut the thread in between.
After winding one side continue with the other side.
After winding with one color the frame will look like the one in the picture below.

Now the frame will be like the one below.

After winding on both sides u will get intersection points where the
threads crosses each other. Now comes
the time consuming part. I will show u how
to tie the crosses.
Take a thread with 5 cms long.Now bring the thread from the lower part of
the frame to the upper part as shown in the picture below.

Now tie a knot tightly.


After tieing both the knots the opposite side will look like this.

Turn the wooden frame. U will see a
'x' mark.
Like this u have to tie all the intersections so that a 'x' is seen in the
opposite side.
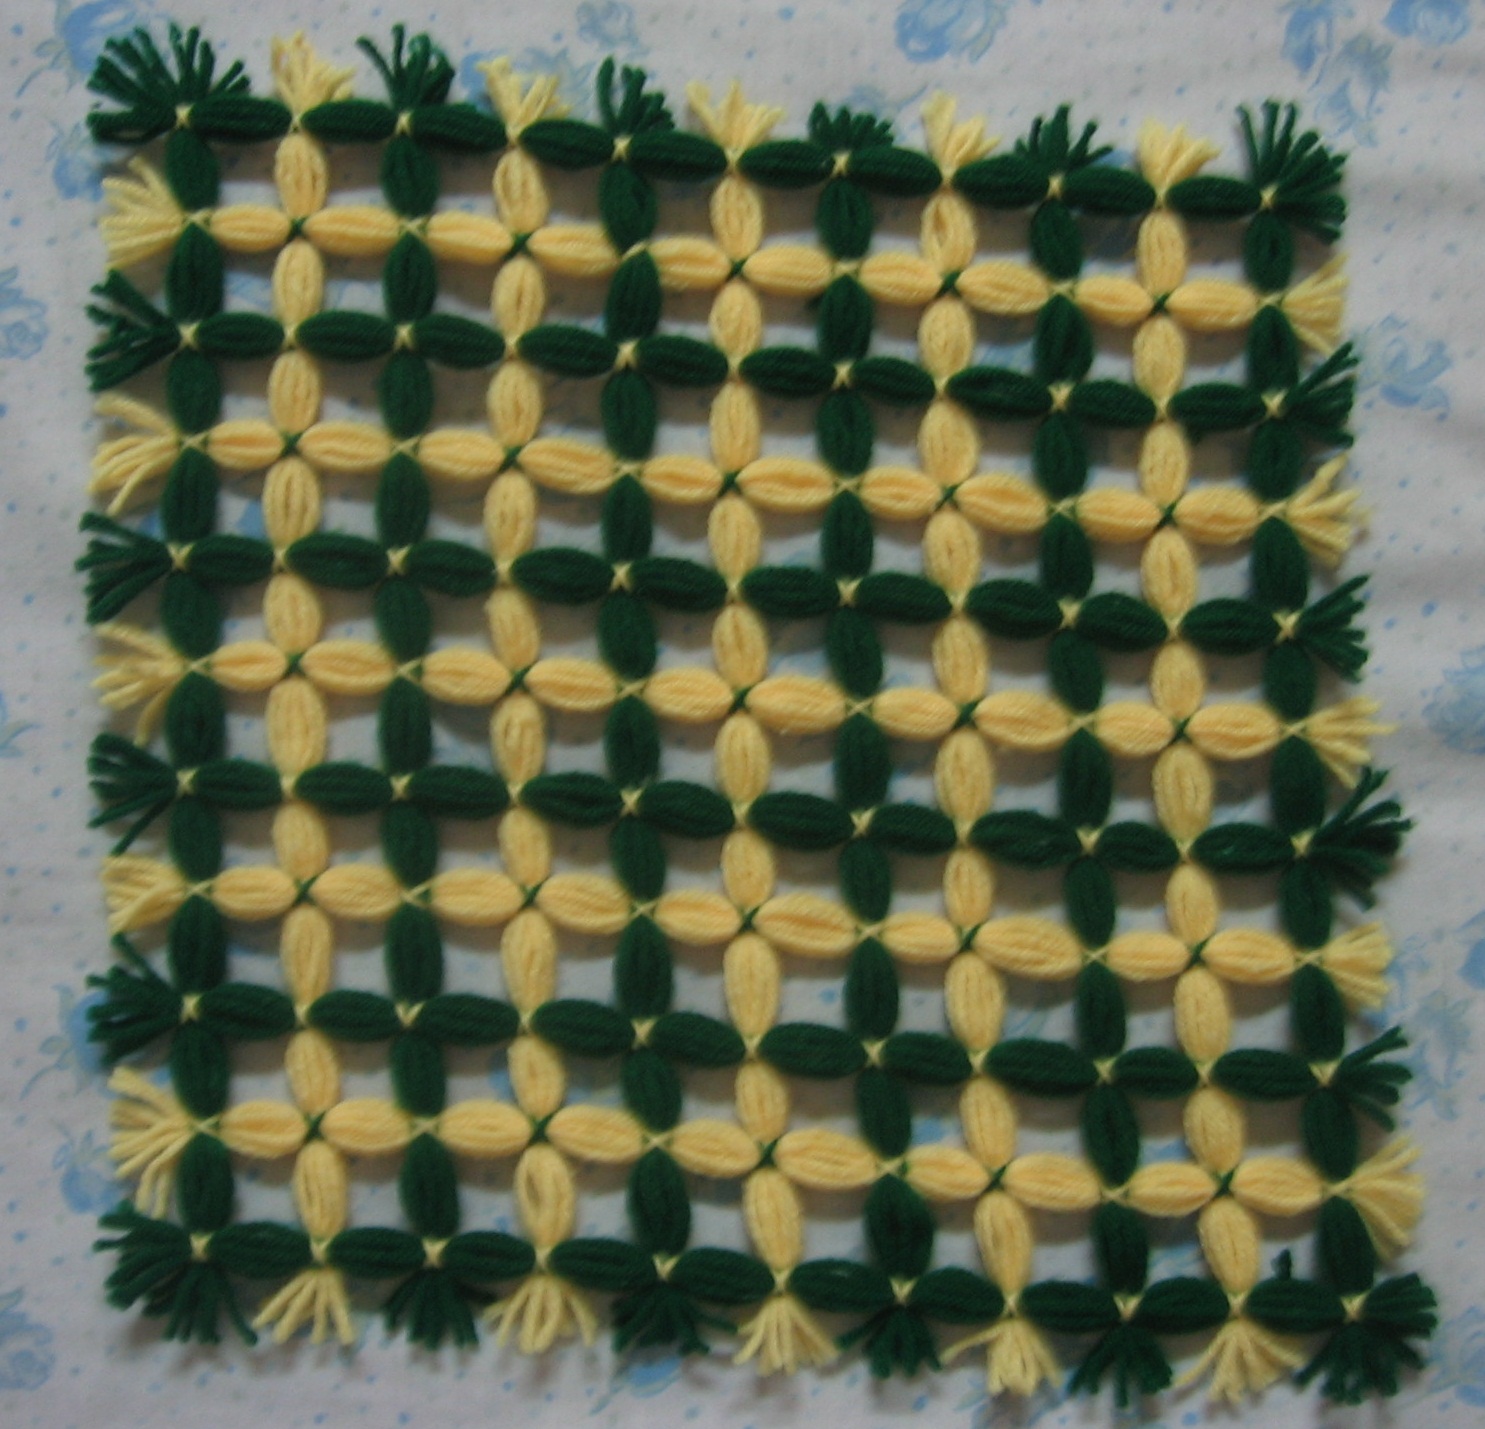
Now cut the edges near the nails for all the four side and trim it. U will get a puffy woollen mat.

Nice tutorial...your SBS photos are very clear...
ReplyDeletewhere is the finished mat photo dear...
http://mahagowri.blogspot.in/
excellent tutorial.... also beautiful craft...
ReplyDeletei liked it very much
WOW super work....very interesting blog you have... iam happy to follow you
ReplyDeleteby
anuprem
Mam can u please guide me as to what size the frame should be and what is the distance between the nails to get the frame done by a carpenter
ReplyDeleteand also please tell me how to use a narrow frame with nails like this in which people make mufflers i have one but i dont know how to use it
I didn't see a way to sign up for updates...or newsletter...do you send out email updates or something? I looked and didn't see a way to do so...
ReplyDeleteI'm doing the Sophie's Universe also...think I saw link to your blog in the comments there...
Excellent tutorial. Mam i dont know to crochet can u plsss show different ways to do craft with woollen thread without crocheting.
ReplyDelete