Welcome back, dear readers! After a short break from posting my weekly progress, I'm back with an update on my colourful crochet blanket. I wasn't able to share last week's progress, so I've decided to combine the progress from the last two weeks into one post. The blanket has continued to grow steadily, and I've added some beautiful new colours to the ripple design.
Showing posts with label Crochet. Show all posts
Showing posts with label Crochet. Show all posts
Monday, September 7, 2026


Tuesday, August 25, 2026
Stash to snuggle - A crochet blanket journey - Week 4 - Adding Shades of green
Welcome back, dear readers! I'm happy to have you join me for Week 4 of my crochet blanket journey. The blanket is continuing to grow steadily, and I'm enjoying experimenting with different colours from my yarn stash. This week, I introduced cream and two shades of green, adding a fresh and natural touch to the colourful ripple design.
Catch Up on the First Three Weeks
If you're joining me for the first time, you can catch up on the earlier stages of my crochet blanket journey before reading this week's update. In Week 1, I introduced the project, shared my yarn stash and colour palette, and began the blanket using the Neat Ripple Pattern. Week 2 brought another seven rows and the addition of maroon, while Week 3 added 12 more rows along with three beautiful shades of pink. Each week has brought new colours and steady progress, and it's wonderful to see how the blanket is gradually growing. Take a look at the previous three updates below and follow along from the very beginning!
Week 4 Update
Six More Stripes Completed
This week, I completed another six stripes, with each stripe consisting of two rows. That makes a total of 12 new rows added to the blanket this week.
I'm pleased that I have been able to maintain a steady rhythm with this project. Working on the blanket row by row makes this large project feel much more manageable, and it is incredibly satisfying to see the ripple pattern getting longer with every week.
Adding Cream and Shades of Green
For this week's colour palette, I introduced cream and two shades of green. The cream adds a soft, neutral element to the bright colours already present in the blanket, while the two greens bring a fresh and natural feel to the design.

I particularly enjoy how the new colours contrast with the recurring bright blue. The blue continues to appear between the different colour combinations, helping to create continuity throughout the blanket while allowing each new shade to stand out.
As the number of colours increases, the blanket is becoming more vibrant and interesting. I love the little surprise that comes with adding each new stripe and seeing how it works with the colours already crocheted.
Another 12 Rows Completed
With 12 more rows completed this week, the blanket is steadily growing into a colourful ripple creation. What started as a collection of 4-ply acrylic yarn from my stash is slowly turning into a beautiful handmade blanket.

I'm learning that consistency is the key to completing a large crochet project. A few rows each day may seem like a small achievement, but when those rows are added together week after week, the progress becomes quite remarkable.
I'm looking forward to continuing this journey and seeing which colours from my stash will make their way into the next section of the blanket.
Another six stripes, 12 rows, and three new colours added—one week closer to completing my ripple blanket!
I'll be back next week with another progress update as the blanket continues to grow, one ripple at a time.
Monday, August 17, 2026
Stash to snuggle - A crochet blanket journey - Week 3 - Adding Shades of Pink
Welcome back, dear readers! I'm delighted to have you join me for Week 3 of my crochet blanket journey. With each passing week, this colourful blanket is slowly taking shape, and I'm excited to share the progress I've made. This week brought some beautiful new additions to the colour palette, including three lovely shades of pink, which add a fresh and vibrant touch to the ripple design. So, let's take a look at what I accomplished this week and see how the blanket has grown, one row at a time! 🧶💗
Catch Up on the Previous Weeks
If you're new to my crochet blanket journey, I'd love for you to start from the beginning! In Week 1, I introduced the project, shared the yarn from my stash, the colour palette, the 4 mm crochet hook, and my first experience with the chainless foundation row. In Week 2, I shared the next stage of the journey, including the addition of seven more rows and the introduction of maroon into the colour sequence. You can read both updates below and then continue here to see how the blanket has grown in Week 3.
Week 3 Update: Adding Shades of Pink
Six More Stripes Completed
This week, I added six more stripes, with each stripe consisting of two rows. That means I completed a total of 12 new rows this week.
I was able to maintain a steady rhythm of two rows per day, which made the project feel much more manageable. Although this is going to be a large blanket and there are still many rows ahead, seeing consistent progress each day is very encouraging.
Introducing Three Shades of Pink
For this week's colour combination, I decided to introduce three different shades of pink into the blanket. The pinks bring a lovely brightness and feminine touch to the existing blue, maroon, brown, orange and yellow shades.
I particularly like how the pink stripes stand out against the recurring bright blue rows. Using the blue between the other colours continues to create a sense of consistency while allowing each new shade to make its own statement.

The ripple pattern is becoming more interesting with every colour I add, and I'm beginning to get a better idea of how the finished blanket might look.
12 More Rows, One Week at a Time
With 12 additional rows completed this week, the blanket is gradually becoming larger and more colourful. It's satisfying to look back at the beginning of the project and see how much it has already grown.
This project is teaching me that a large crochet blanket doesn't have to be completed all at once. Setting a small daily goal—in my case, two rows a day—makes the project enjoyable and achievable.
I'm looking forward to continuing this colourful journey and discovering how the next set of colours will come together.

Another 12 rows completed, three beautiful shades of pink added, and one more week of crochet memories created! 🧶💙💗
I'll be back next week with another update as this Neat Ripple Blanket continues to grow, one row at a time.
Monday, August 10, 2026
Stash to snuggle - A crochet blanket journey - Week 2
Welcome back, dear readers! I'm so happy to have you join me for Week 2 of my crochet blanket journey. This colourful project is slowly growing row by row, and I'm excited to share the progress I've made this week. It has been wonderful watching the Neat Ripple Pattern come to life as I add new colours from my yarn stash. So, grab your favourite cup of tea and let's take a look at how the blanket has grown this week!
If you’re joining me for the first time, you can catch up on how this crochet blanket journey began in my Week 1 update. I shared the yarn colours from my stash, the Neat Ripple Pattern, my first experience with a chainless foundation row, and the progress I made during the first week. Read the Week 1 Crochet Blanket Update here and then continue with this week’s progress.
It’s time for the second weekly update on my crochet blanket journey!
This week, I managed to add seven more rows to the blanket. With each new row, the ripple pattern is becoming more defined, and I’m really enjoying watching the blanket gradually take shape.

For this week’s colour combination, I continued using my bright blue as the main recurring shade and introduced maroon into the stripe sequence. The deep maroon adds a lovely contrast to the bright blue and gives the blanket a richer, more vibrant look.
I’m particularly enjoying the way the bright blue keeps appearing throughout the blanket. Since I have more of this colour in my yarn stash, I plan to use it alternately between the other colours, creating a consistent flow throughout the design.
Here’s a closer look at the stitches and colour combination in this week’s progress. The close-up shows the beautiful texture of the Neat Ripple Pattern and how the bright blue and maroon stripes complement each other. I’m especially enjoying the neat, flowing ripples and the way each colour adds its own character to the blanket.

So far, the project is progressing steadily, one ripple and one row at a time. There is still a long way to go, but seeing those colourful stripes grow is making every stitch worthwhile.
Seven more rows completed this week—and I’m excited to see what the next week brings!
Monday, August 3, 2026
Stash to Snuggle – A Crochet Blanket Journey - Week 1
Every crochet project begins with a single stitch, and today I'm starting one that has been on my mind for a long time.
Like many crocheters, I've collected quite a few balls of 4-ply acrylic yarn over the years. Instead of letting them sit in my stash, I've decided it's time to transform them into something beautiful, practical, and filled with memories—a large handmade crochet blanket.
This won't be a quick weekend project. A blanket of this size takes patience, consistency, and many hours of stitching. But that's one of the things I love most about crochet. Each row tells a story, and every finished section is a reminder that even the biggest projects are completed one stitch at a time.
I'll be sharing this journey here on my blog.

These are all 4-ply acrylic yarns that I've gathered over time in a beautiful mix of vibrant, pastel, and neutral shades. Instead of leaving them tucked away, I've decided to give them a new purpose by turning them into one large crochet blanket. Each color will add its own personality to the design, making the finished blanket a unique reflection of creativity, patience, and the joy of making something beautiful from what I already have.
In this stash I have 4 hanks of Bright blue colour yarn and 7 to 8 black colour yarn. But I am using black for 1 or 2 stripes. And using Bright blue as the major colour. I have no idea how to arrange these colour. Thanks to chatgpt. It crocheted me a sample blanket with these colours. I will be making some changes in the stripe colours.

For this blanket, I'm using a 4 mm crochet hook, which gives the stitches a lovely, even texture with my 4-ply acrylic yarn.
One new technique I'm trying in this project is the chainless foundation row. This is my first time using this method, and I'm already appreciating the clean, flexible edge it creates compared to a traditional foundation chain. Since it deserves a detailed explanation of its own, I'll be sharing a separate blog post with a step-by-step tutorial on how to work the chainless foundation row.
The blanket is being crocheted using the beautiful Neat Ripple Pattern by Attic24, a timeless ripple design that works wonderfully with multiple colours and is perfect for making the most of a yarn stash.
As with any new technique, the first row took a little longer than expected. It took me approximately 30–35 minutes to complete the foundation row. Although it required patience, I know the pace will improve as I become more familiar with the pattern and settle into a comfortable rhythm.

"The first 12 rows are complete! The ripple pattern is taking shape, and I'm loving how these warm and cool shades complement each other. One row at a time, this blanket is coming to life."
Every large crochet project begins with a single stitch, and I'm excited to see this blanket grow with each passing week. Although I've only completed the first 12 rows, I'm already enjoying the process and looking forward to watching the colours come together into a beautiful finished piece.
Thank you for following along on this journey. Your encouragement and support mean so much to me.
I'll be back next Monday with my first weekly progress update, where I'll share how much the blanket has grown, the colours I've added, and my experience working on this project throughout the week.
Until then, happy crocheting, and remember...
One stitch at a time, beautiful things are created.
Edited
Thursday, January 30, 2025
Crochet purses
Hi all
Hope all are doing well and good. Today I am happy to show you my crochet purses which I have made recently.
SOLD OUT


All the three purses are made using Anchor knitting cotton and a 2.5 mm hook. They are made with rounds of dc's and attached to a plain cotton purse. I will be showing the process in another post. All these three purse and you can buy it from here.
Hope you all like these purses. Have a nice day and happy crocheting.
Thursday, January 23, 2025
MCP Update and a new start
Hi all
Hope all are doing well and good. In 2015 I have started a mega cross stitch project named "Harmony". You can see it here. It went on slow and steady. But after starting my youtube channel that project has been left unattended. And in December 2020 I have showed the last progress. you can view it here. After that I was stitching now and then and completed 4 to 5 pages which I haven't recorded the progress. Again this year I have decided to complete my long time WIP's and this is the one which I have decided to finish first. So spending maximum time for this and made a decent progress till now. You can see how much I have progressed from 2021 to till date from the below pictures. Still 20% of the stitches is remaining. Hoping to complete it soon.

After

Before

Pattern used is SmoothFox's May flower - Square. You can find the free pattern here.
For me the square is 5". The yarn I am using is Olivia Double knit yarn from Ganga Acrowools. I am using 4mm hook. And I am planning to crochet 15 of these to make a 16" cushion cover. Will keep updating the progress.
Hope you all like these projects. See you soon with another interesting post. Till then, have a nice day and have a happy time with your needle and thread.
Thursday, April 11, 2024
Popcorn flower coaster
Hi all
Hope all are doing well and good. Happy to share with you a crochet coaster pattern with you after some time.

Video tutorial
Materials Needed
---------------------------
4 ply acrylic yarn
4mm crochet hook
Let's move onto the pattern.
Rnd 1:
----------
With color A
In magic ring, ch 3(counts as 1st dc)
11 dc in the ring
slip stitch in 3rd chain of ch 3.

Rnd 2:
---------------
ch 3, dc in base of ch 3
(2 dc in each dc around)
slip stitch in 3rd chain of ch 3

Rnd 3:
------------
ch 3, dc in base of ch 3
(dc in next stitch
2 dc in next stitch) around. Ends with 1 dc
Slip stitch to 3rd chain of ch 3.

Rnd 4:
------------
ch 3, dc in base of ch 3
(dc in next 2 stitches
2 dc in next stitch) around. Ends with 1 dc
Slip stitch to 3rd chain of ch 3.

Rnd 5:
------------
ch 3, dc in base of ch 3
(dc in next 3 stitches
2 dc in next stitch) around. Ends with 1 dc
Slip stitch to 3rd chain of ch 3.
Fasten off Color A.

Rnd 6:
---------
Attach color B with a standing dc
dc in the same stitch as joining
ch 2
2dctog in the same stitch
[ch 1
skip 2 stitches
(2dctog, ch 2, 2 dctog) in next stitch] around
ch 1, slip stitch to standing dc
Fasten off color B.

Rnd 7:
----------
Attach Color C with a slip stitch in any ch 1 space
[chain 2
6dc popcorn in next chain 2 space
chain 2
slip stitch in next chain 1 space]
ending with slip stitch in 1st slip stitch.
Fasten off color C.


Hope you all like this pattern. See you soon with another design. Have a nice time.
Wednesday, March 6, 2024
Barette clips with crochet flowers
Hi all
Hope all are doing well and good. Today I am happy to share with you a hair accessory which I have made with crochet flowers.

If you love to make one by yourself you can follow the video below
If you don’t have time to make one for yourself, you can purchase them from me in the following insta page.
https://www.instagram.com/p/C37u76pvVzg/?igsh=NjlxMWltOWlqbDBm
Hope you like this product and tutorial. Do follow my insta page for more handmade products. Also subscribe my YouTube channel if you like to watch hand embroidery videos.
Thank you and have a nice day.
Saturday, January 22, 2022
Easy peasy crochet frock for 3 months old baby
Hi all
Hope all are doing well and good. Today I am happy to share with you a simple crochet pattern for a 3 months old baby. It consists of only chains, double and single crochets. So a beginner can also attempt it. Here is the frock

Making of the frock step by step is given in the following video. Do have a look if you want to see how the frock grows.
I used 4 ply yarn and 3.5 mm crochet hook.
Let’s move on to the pattern
This frock is worked in rounds.
Abbreviations:
V-st : dc, chain 2, dc
Shell : 2 DC , chain 1 , 2 DC
dc - double crochet
sc - single crochet
rep - repeat
dc - double crochet
sc - single crochet
rep - repeat
Ch 88 + 1
Round 1:
DC in 2nd chain from hook.
DC in the remaining 87 chains
Join with slip stitch to first DC.
DC in the remaining 87 chains
Join with slip stitch to first DC.
Round 2:
Chain 2, DC in first DC
DC in the next DC’s
V-st in the next DC
[ DC in the next 21 DC
V-st in the next dc] rep 3 times
Join with slip stitch.
Round 3:
Chain-2, DC in the first DC
Dc in the next 21 DC
V-st in the next ch-2 space
[ DC in the next 23 DC’s
V-st in the next chain 2 space] 3 times
Dc in the next dc
Join with slip stitch to first dc.
Round 4:
Chain-2, DC in the first DC
Dc in the next 22 DC
V-st in the next ch-2 space
[ DC in the next 25 DC’s
V-st in the next chain 2 space] 3 times
Dc in the next 2 dc
Join with slip stitch to first dc.
Round 5:
Chain-2, DC in the first DC
Dc in the next 23 DC
V-st in the next ch-2 space
[ DC in the next 27 DC’s
V-st in the next chain 2 space] 3 times
Dc in the next 3 dc
Join with slip stitch to first dc.
Round 6:
Chain-2, DC in the first DC
Dc in the next 24 DC
V-st in the next ch-2 space
[ DC in the next 29 DC’s
V-st in the next chain 2 space] 3 times
Dc in the next 4 dc
Join with slip stitch to first dc.
Round 7:
Chain-2, DC in the first DC
Dc in the next 25 DC
V-st in the next ch-2 space
[ DC in the next 31 DC’s
V-st in the next chain 2 space] 3 times
Dc in the next 5 dc
Join with slip stitch to first dc.
Round 8:
Chain-2, dc in the 1st DC
DC in the next 26 DC
*[dc in the chain 2 space
Skip the next 33 DC
Dc in the next chain-2 space] *
Dc in the next 33 DC
Rep from * to * once
Dc in the next 6 DC’s
Join with slip stitch to first dc.
Round 9 - 14:
1 DC in each DC around - 70 DC
Join to first dc.
Round 15:
2 DC in every 15th DC and 1 DC in every other DC’s
Join to first dc.
Round 16:
2 DC in every 10th DC and 1 DC in every other DC’s .
Join to first dc.
Fasten off colour A.
Round 17:
Join colour B.
1 DC in each DC.
Round 18:
(1 DC, chain-1, skip 1 DC ) repeat around
Round 19:
Slip stitch into chain 1 space
(Chain 2, DC, chain 1, DC) in the same chain1 space
V-st in each each chain 1 space around
Join with slip stitch to first dc .
Round 20:
Slip stitch to chain 1 space
(Chain 2, DC, chain 1, 2 DC) in the same chain1 space
(SC in the next chain1 space
Shell in next chain1 space) rep around
Join with slip stitch to first dc.
Round 21:
Slip stitch to chain 1 space
(Chain 2, DC, chain 1, 2 DC) in the same chain1 space
(DC in the next SC
Shell in next chain1 space ) rep around
Join with slip stitch to first DC.
Round 22:
Slip stitch to chain 1 space
(Chain 2, DC, chain 1, 2 DC) in the same chain1 space
[ skip the next 2 DC
2 DC in the next DC
Skip 2 DC
Shell in chain 2 space ] rep around
Join with slip stitch to 1st DC .
Round 23:
Slip stitch to chain 1 space
(Chain 2, DC, chain 1, 2 DC) in the same chain1 space
[ skip the next 3 DC
3 DC in between the 2 DC’s (3 dc group is formed)
Skip next 3 DC **
Shell in chain 2 space ] rep around & finish at **
Join with slip stitch to 1st DC .
Round 24 - 27:
Slip stitch in to chain2 space
[ shell in chain2 space
1 DC in each DC of 3 DC group] rep around
Fasten off colour B.
Round 28 & 29:
Join colour A.
Rep round 24.
Fasten off colour A.
Round 30:
Join colour B.
Slip stitch to chain2 space.
(2dc, chain2, 2dc) in same space & around.
Fasten off.
Hope the pattern is clear. Do give a try and drop your feedback’s in the comments section.
This post has been linked to Craftastic Monday Link Party, Handmade Monday , Wednesday Link party
Monday, January 3, 2022
Crochet Frock, Sling Bag, Hair clips
Hi all
Happy New Year to all.
Last year was a productive year on the crafty side. Made a lot of things, Started my you tube channel, learned so many new things and started selling my handmade items through insta. After starting that page I have got my first custom order to make a crochet frock for a 3 year old for her birthday. I am so happy on receiving that order. The customer chose a design from the photographs I send and the tricky part is I have to make the frock according to the measurements send by them. That was not in my comfort zone. But I don't want to leave that order. So took courage and said a yes to them and I have to finish it within 15 days.
Placed the order for the yarn and it took 9 days to arrive. I started crocheting the frock when there is 6 days left. Managed to shape the neck according to the measurements. And the frock started to grow and this was the final result. I have completed the frock within 3 days.


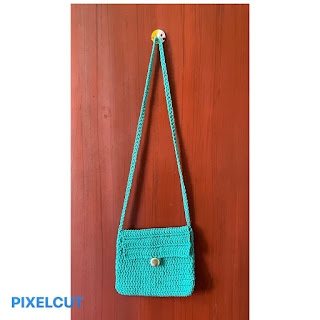
They have asked me a matching bag and hair clips. So I made a small sling bag that goes with the bag and a matching hair clip with a simple flower.


This is the birthday girl wearing the frock.


Pattern for the frock is from here.
Yarn is from Pradhan Embroidery Stores.
I have used 3.5mm crochet hook.
Now I am more confident in crocheting frocks and this year I have planned to design crochet frocks and skirts. More than crocheting, designing takes time. If we have the pattern in hand we can crochet anything in a jiffy. So that's all for today. Tomorrow I will come up with a simple embroidery border. Till then have a nice day and happy crocheting
Subscribe to:
Posts (Atom)