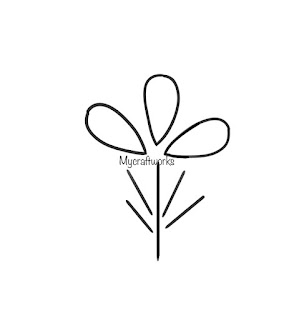
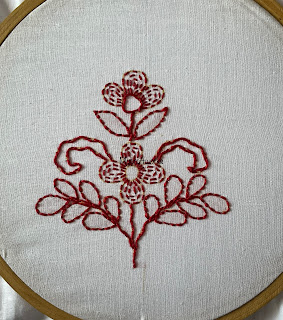
The next stitch we are going to learn today is Gol Murri Stitch.
Tuesday, August 29, 2023
Chikankari Embroidery Class - 7, Gol Murri Stitch in 2 ways
Monday, August 21, 2023
Chikankari Embroidery Class 6 - Murri Stitch (sada Murri)
Today we will learn the next stitch- Murri Stitch. This is also known as sada Murri. This is used to stitch straight lines in chikankari Embroidery. We use 3 strands of thread for this stitch.
Friday, August 18, 2023
Kutch work design for cushion covers
Hi all
Today I am happy to share with you a simple cushion cover design in Kutch work. This is a circular pattern and works well for Kurtis also. This pattern has four simple Kutch work motifs with a whipped running stitch circle.
Thursday, August 17, 2023
Chikankari Embroidery class 5 - Balda stitch
Today let us learn the next stitch in chikankari Embroidery. It is Balda stitch. It is another simple stitch but a little time consuming. Although it is time consuming it produces an elegant look. This stitch is mostly used for stems and fern leaves.
Monday, August 14, 2023
Chikankari Embroidery Class 4, Tepchi, Tepchi Pechni stitches
Today we will learn the next simple and easy stitches named Tepchi and Tepchi pechni stitch.
Tepchi is the Simple running stitch and Tepchi pechni is interlaced running stitch.
Friday, August 11, 2023
Chikankari Embroidery class 3, Bakya stitch in 2 ways
Today we will learn how to do bakya stitch in chikankari Embroidery. This is a main stitch in chikankari. It is also known as shadow stitch. It creates a beautiful shadow effect on the front side of the fabric in the colour of the thread you are working on.
This is the design I have worked for practising bakya stitch.
Thursday, August 10, 2023
Chikankari Embroidery Class 2 - Rahet, Pashni Stitch
Today we will learn the next two basic stitches in chikankari Embroidery. These stitches are used for lines and curves.
Rahet stitch - Basic stem stitch is known as Rahet stitch in chikankari. 3 strands of thread is used for doing this stitch.
Pashni Stitch - Basic whipped back stitch is known as Pashni in chikankari. 3 strands of thread is used for back stitch and whipping it.
———————
Tuesday, August 8, 2023
Chikankari Embroidery class 1 - Janjira Stitch
Hi all
Hope all are doing well and good. From today I am starting a series on chikankari embroidery. First I will cover all the basic and advanced stitches used in chikankari work. And then I will be moving on to small designs and finish off with a neckline embroidery project.
So the first basic stitch is Janjira. It is the normal chain stitch used in hand embroidery. We use 2 strands of thread for this stitch. I have given a practice design and the video tutorial. Do try it out.
Monday, August 7, 2023
Back stitched herringbone stitch - Embroidery stitch video tutorial
Hi all
Today I am happy to share with you the video tutorial of a variation of herringbone stitch. It is back stitched herringbone. This stitch combines both back stitch and herringbone stitch.
Saturday, August 5, 2023
Easy flower embroidery
Hi all
Hope all are doing well and good. Today I am happy to share with you a simple embroidery flower design. This design is suitable as a motif for cushion covers, or it can be used for kids dresses. Or it an be used anywhere as a single flower 🌺 motif.


