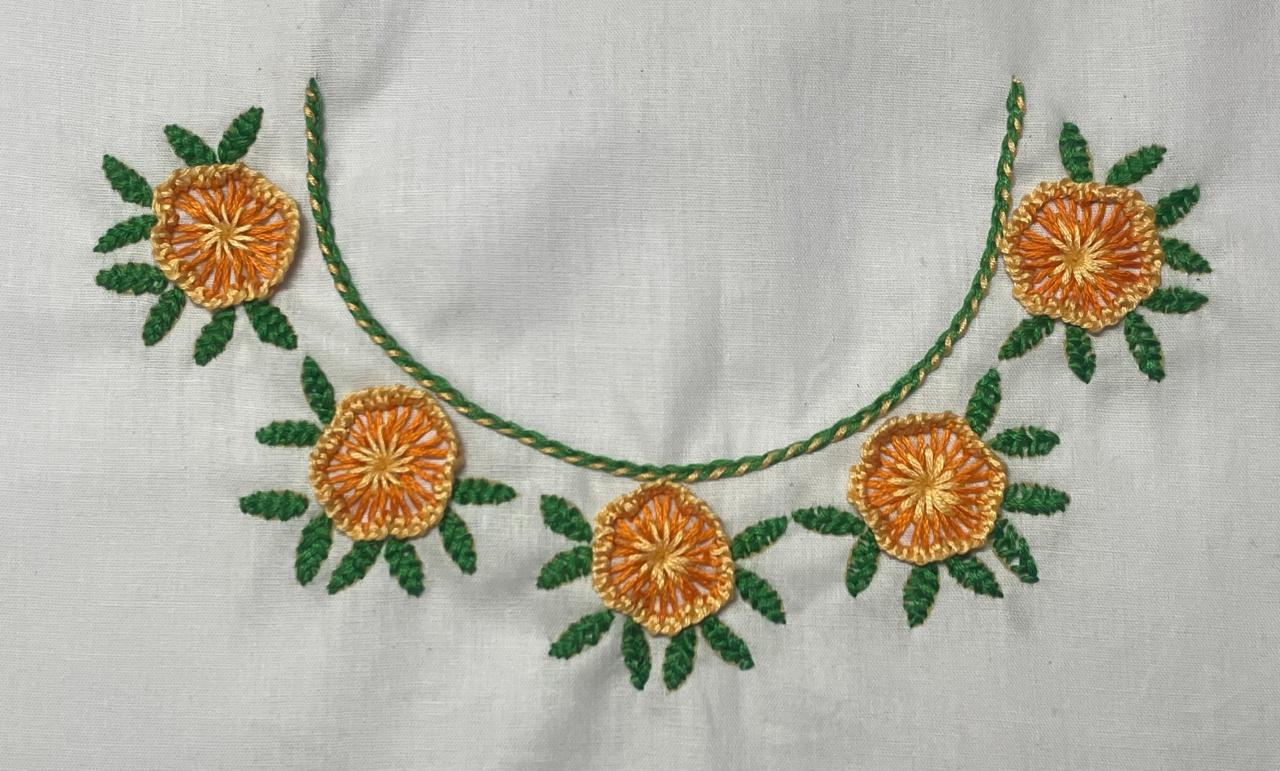
Burden Stitch comes under the family of couching in hand embroidery. It is a filling stitch. It takes brick like structure after completion. It adds wonderful texture to the fabric.
1) I am working on a 2.5" square area to explain this stitch. Divided the square parallelly in every 0.20" to get uniformity.
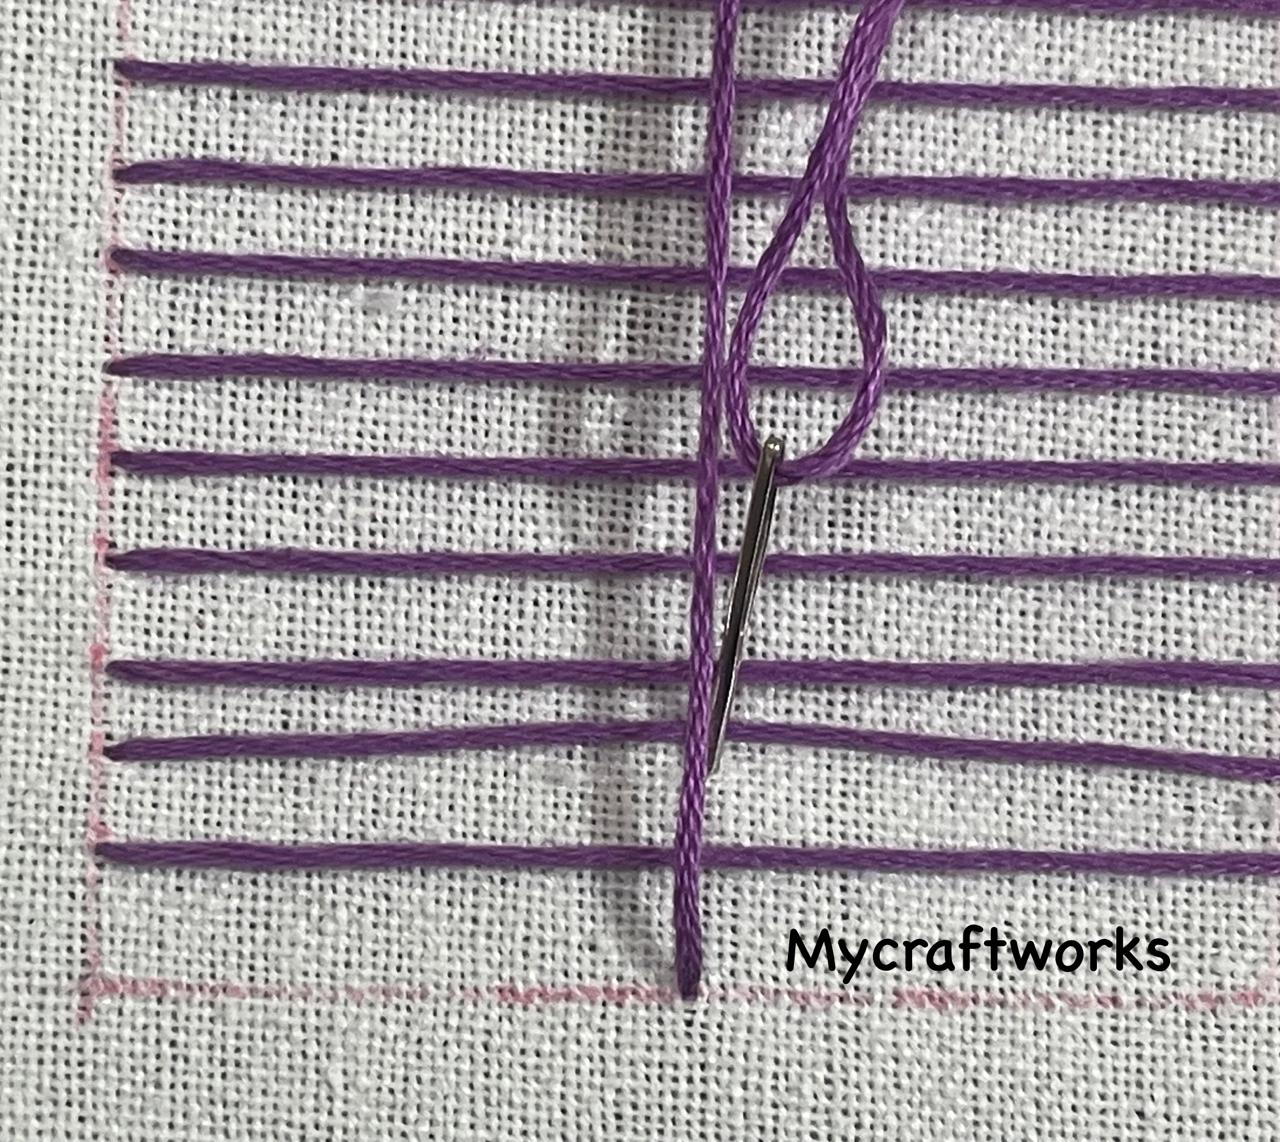
2) Make parallel straight stitches - they are known as laid stitches, working from left-right and right-left alternately.
To get neat stitches, I have started from the centre. You can start from left or right also. Bring the needle up through the fabric in the base line.
3) Bring the needle back down below the horizontal stitch two rows above. Pull through the thread to the back.
4) You will get a straight stitch that couches the laid stitch.
5) Now bring the needle up above the horizontal laid stitch in the second row, adjacent to the first stitch.
6) Bring the needle back down below the horizontal stitch two rows above as shown. Pull through the thread to the back. You will get another straight stitch adjacent to the first stitch
7)Repeat steps 2-6 to the right side.
8)Below is a picture with burden stitches to the right side. Bow repeat the same on the left side.
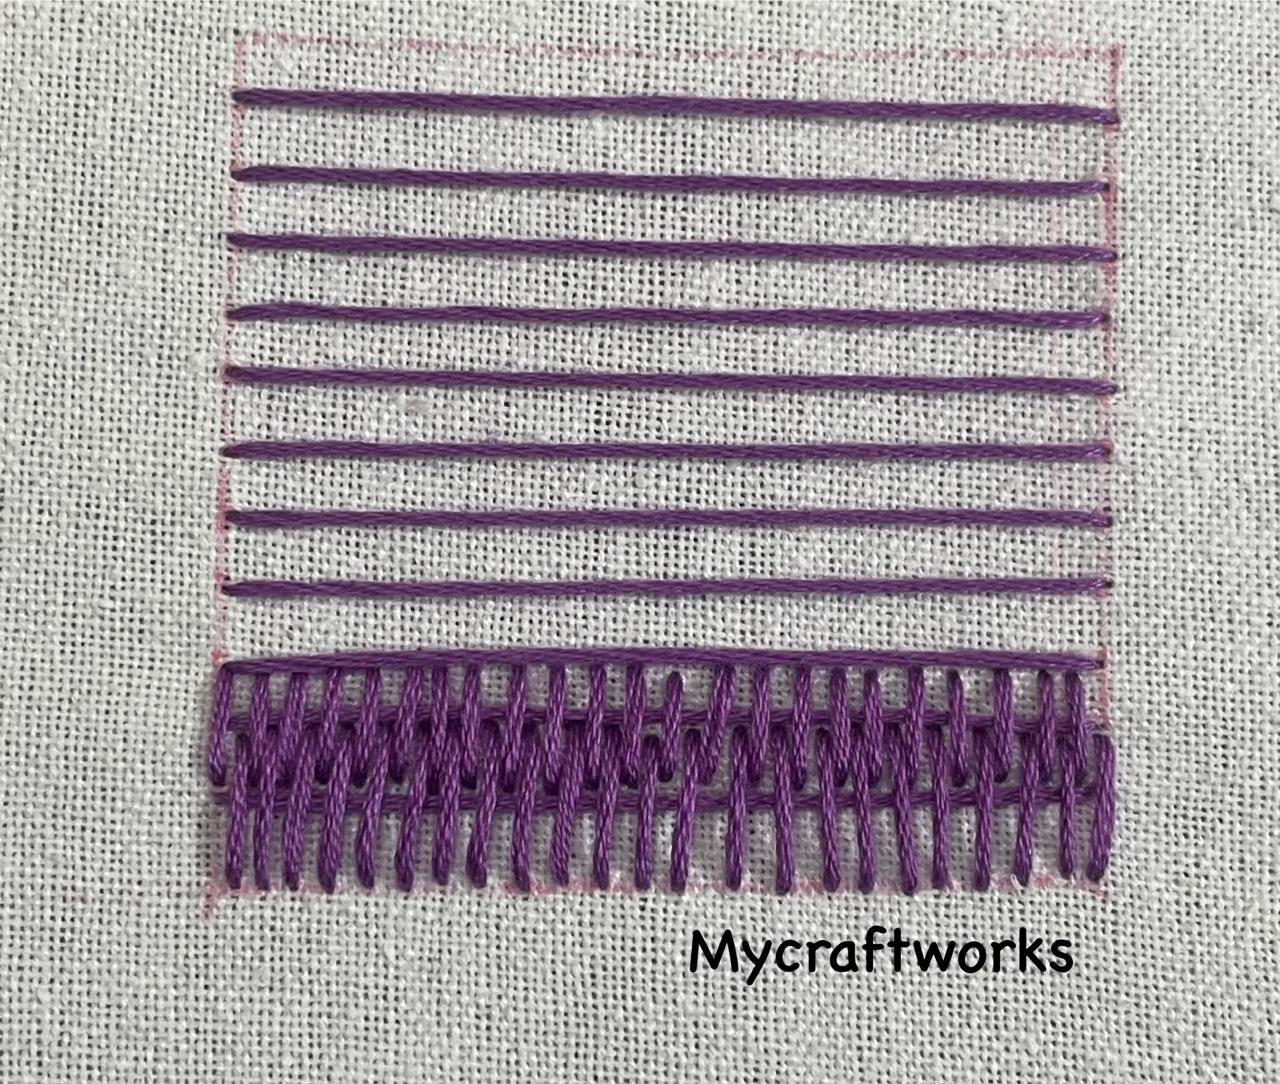
9)First set of burden stitches complete.
10) Here you can see second row is completed fully. First and third rows are partially filled.
For the second set of stitches, start from the third row above the laid stitch and continue steps 2-6. From here you can make adjacent stitches working three rows at a time or you can work to fill the gaps working two rows at a time.
11)The picture below shows working adjacent burden stitches involving 3 rows.
12)The picture below shows the working involving two rows (alternate stitches are done). I prefer this way.
13)Continue working to fill the fabric area. You can change colors also. I have used 3 colors in this work.
14)When you reach the end you can see the top and base part are partially filled. you can make straight stitches above the first laid stitch alternatively which completes the burden stitch in the top.
15)Similarly fill the base part working straight stitch below the last laid stitch alternatively which fills the marked area completely. And the beautiful burden stitch is ready.
You can work burden stitch to fill any shapes. Do include this stitch in your embroidery projects and have fun.
See you soon with the video of this stitch. Till then, have a nice time with your needle and thread.