Monday, June 10, 2024

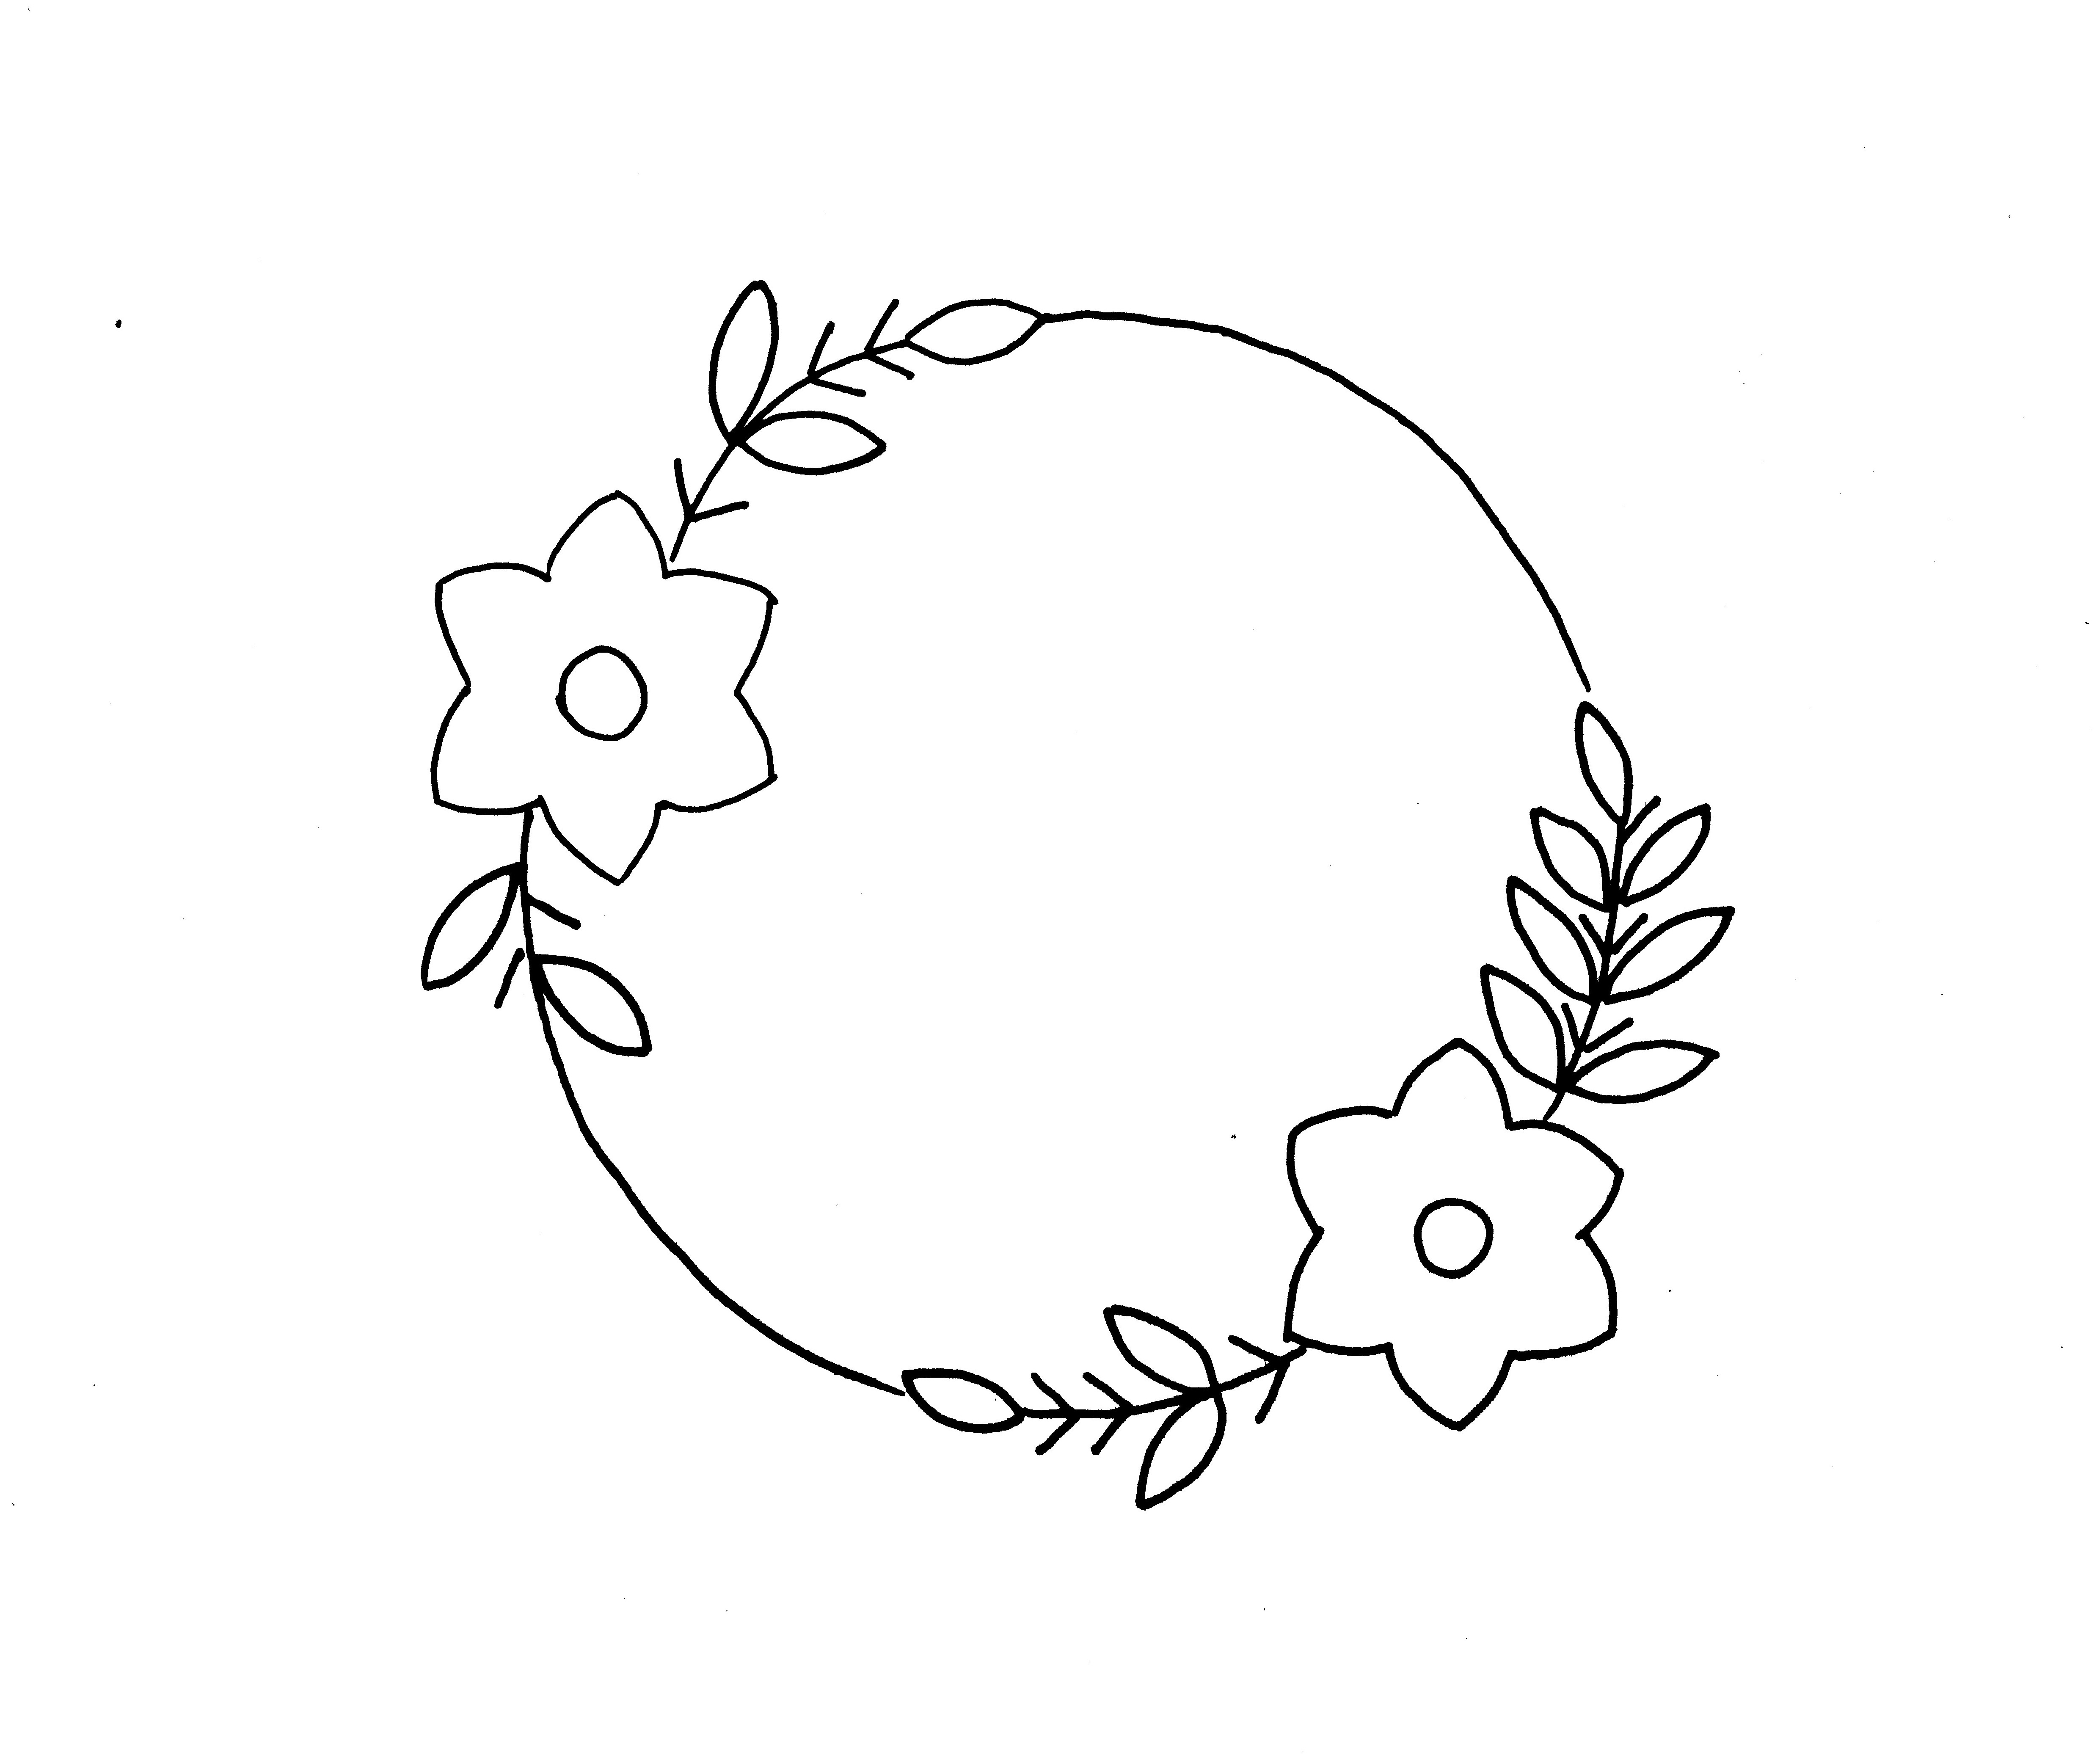
Pistil stitch flower embroidery design

 Hi all 

Hope all are doing well and good.  Today I am happy to share with you a simple embroidery design for beginners.  It features pistil stitch flowers and twisted chain stitch.  The video below shows how to do the stitches.

Leaves are done in two ways and the circle line is embroidered using twisted chain stitch.  


Video Tutorial 👇👇


Pattern for the design
----------------------
Anchor Threads used
---------------------------------
Flowers - 335 & 302
Leaves & lines - 239
French knots in flower centre - 355
Pistil stitch in between leaves - 302

Stitches used
---------------------
Flowers - Pistil stitch - 3 strands
Leaves - Fishbone & Fancy leaf(watch video) - 6 strands
Stem - Back stitch - 6 strands
Circle - Twisted Chain stitch - 6 strands
Centre of flowers - French knots - 6 strands - 1 wrap

Hope you all like this design.  See you soon with another design.  Till then, have a nice time with your needle and thread.

Friday, June 7, 2024

Kutchwork border design with mirror for beginners

 Hi all

Hope all are doing well and good.  Today I am happy to share with you another simple Kutch work design that can be used as borders.  This can also be used in the yoke part of a kurti.  You can also expand this design to make it as an overall design.  Hope you like it.


Video Tutorial

Pattern for the design 
——————————

I have used 6 strands of thread to embroider this design.  You can use sequins or mirrors for the circle part.  

I am hoping that this design will be useful.  See you soon with another design.  Till then have a nice day.  Have a nice time with needle n thread.

Wednesday, May 29, 2024

A simple kutch work design for beginners

 A simple kutch work motif for beginners.


Video Tutorial 👇👇

Pattern
-----------------
You can find a kurti yoke design using this pattern here.  Hope you all like this pattern.  Do give a try and let me know in the comments.  

See you soon with another embroidery series.  Till then have a nice time with your needle and thread.  


Thursday, May 23, 2024

Kutch work yoke design with pattern

 Hi all

Hope all are doing well and doing.  Today I am happy to share with you a kutch work yoke design.  It is worked on silk cotton fabric with 6 strands of anchor thread.  


Video Tutorial can be found here

Pattern
------------------

You can print it in an A4 paper and work with 6 strands of thread. 

Hope you all like this pattern.  See you soon with another design. 
Thank you and have a nice day.

Friday, May 17, 2024

Embroidered hoop art with verse

Hi all

Today I am happy to share with you a simple hoop design with a bible verse.  


Pattern for the design 
——————————------

Stitches used
------------
Round flowers - Woven rose 
(6 strands for spokes, 12 strands for weaving)
big leaves - fishbone stitch ( 6 strands)
Stem - Stem stitch (6 strands)
small leaves - straight stitches ( 6 strands)

Hope all of you like this design.  See you soon with another design.  Have a nice day.

Saturday, April 13, 2024

2 ways to do mirror embroidery using Long tailed daisy stitch

 Hi all

Here is a video tutorial to do mirror work in 2 ways using the long tailed daisy stitch.  Very easy and can be done within minutes.  It makes a great motif as an over all design.  


Video Tutorial👇👇


Hope all of you like this video.  See you soon with another stitch tutorial.  Till then, have a nice time with your needle and thread.  

Thursday, April 11, 2024

Popcorn flower coaster

Hi all

Hope all are doing well and good.  Happy to share with you a crochet coaster pattern with you after some time.  


Video tutorial

Materials Needed
---------------------------
4 ply acrylic yarn
4mm crochet hook

Let's move onto the pattern.

Rnd 1:
----------
With color A
In magic ring, ch 3(counts as 1st dc)
11 dc  in the ring
slip stitch in 3rd chain of ch 3.

Rnd 2:
---------------
ch 3, dc in base of ch 3
(2 dc in each dc around)
slip stitch in 3rd chain of ch 3

Rnd 3:
------------
ch 3, dc in base of ch 3
(dc in next stitch
2 dc in next stitch) around.  Ends with 1 dc
Slip stitch to 3rd chain of ch 3.

Rnd 4:
------------
ch 3, dc in base of ch 3
(dc in next 2 stitches
2 dc in next stitch) around.  Ends with 1 dc
Slip stitch to 3rd chain of ch 3.

Rnd 5:
------------
ch 3, dc in base of ch 3
(dc in next 3 stitches
2 dc in next stitch) around.  Ends with 1 dc
Slip stitch to 3rd chain of ch 3.
Fasten off Color A.

Rnd 6:
---------
Attach color B with a standing dc
dc in the same stitch as joining
ch 2
2dctog in the same stitch
[ch 1
skip 2 stitches
(2dctog, ch 2, 2 dctog) in next stitch] around
ch 1, slip stitch to standing dc
Fasten off color B.

Rnd 7:
----------
Attach Color C with a slip stitch in any ch 1 space
[chain 2
6dc popcorn in next chain 2 space
chain 2
slip stitch in next chain 1 space]
ending with slip stitch in 1st slip stitch.
Fasten off color C.


Hope you all like this pattern.  See you soon with another design.  Have a nice time.
 

*/