Showing posts with label Kasuti embroidery yoke. Show all posts

Monday, March 13, 2017

Kasuti Embroidered yoke, EPP

Hi all 
Thanks for all your encouraging comments on my kutch work bag.  I have some completed projects to blog about.  But feeling lazy to edit the photos and write a post.  But today I have decided not to be lazy that too at the beginning of the week and determined to write this post.  

I have completed this kasuti embroidered yoke for my co sisters colleagues mother.  Already I have done a kurti with this yoke.  Seeing that she wanted another one with the same design in peacock blue background.  I am able to get only this blue and have done it.  It has been sent to her. I am glad that she likes it.


I have used three strands of anchor embroidery thread no. 63 throughout.  Now I am embroidering one more kurti for me and it is in progress.  Hoping to finish before Easter.

This year I have tried my hands on EPP - English Paper Piecing.  Inspiration came from here.  Pamela used to come up hexagons on every Monday.   Also the tutorials from youtube urged me to start trying and see this is what I came up with.


I am going to finish this into a pincushion. After trying these hexagons I wanted to do more.  so now and then I am making hexagons.  Will go for a cushion project when I have enough hexagons in my basket.  I am trying to make a table cover from my computer table using HST(Half square triangle), to make us of my fabric stash.  It is also coming up nicely.  I am enjoying doing it.  Have to find the backing cloth with a thin batting between.  

So Whats up in your side.  My works baskets are full with crochet, cross stitch, sewing quilt blocks, etc.  Are u a person having so many projects in your basket.  How will work on it? Do let me know.

Wednesday, October 19, 2016

A Kasuti Finish

Dear friends

Today I am here to show you my latest finish in kasuti embroidery.  It is made for custom order.  My co-sisters colleague gave her a self print material and the pattern for neck.  This is the first time I am making a customized neck pattern and I found it a bit challenging because, the pattern which I had with is a diamond shaped motif. But she wants it in a square shape.  So I drew it again in a graph paper.  The kasuti net which I am having is of larger count and the motif doesn't look good after embroidering it.  So I drew the whole pattern in a graph paper and then transferred it to the fabric with red carbon paper.  After that stitching becomes easy coz I don't want to remember the forward and return passes in the design.

I am not satisfied with this embroidery because the embroidery is not prominent in the printed fabric. But she wants it to be simple as such and she selected the green color.  I was not able to take a decent shot of the embroidery.  These are some better snaps.

This the neck part which extends till waist.

This is a bigger motif in the front border.  I worked three such motifs  for the border.

This is the motif which I have worked for the sleeves and neck.  For sleeves I have worked four such motifs and seven motifs for neck part.

Click on the images for a better view.

Thread used: Anchor no.189
No of strands: 3
Design from : Mridulas design book

Out of 4 order I have completed 3 and I am off to start the fourth one which is again kasuti embroidery project.  Fabric, design and threads everything is ready.  I will be starting it this week.

Also before christmas I am planning to do one kurti for myself. But I am in a great confusion in selecting the design.  Disadvantage of having design books in hand.

Also, a simple cross stitch and a crochet project is also in WIP basket. They are for christmas.  So I will be back with another FO. Till then, have a happy time with needle n thread.

Monday, March 28, 2016

Kasuti Yoke and Border - Finished

Hi friends,

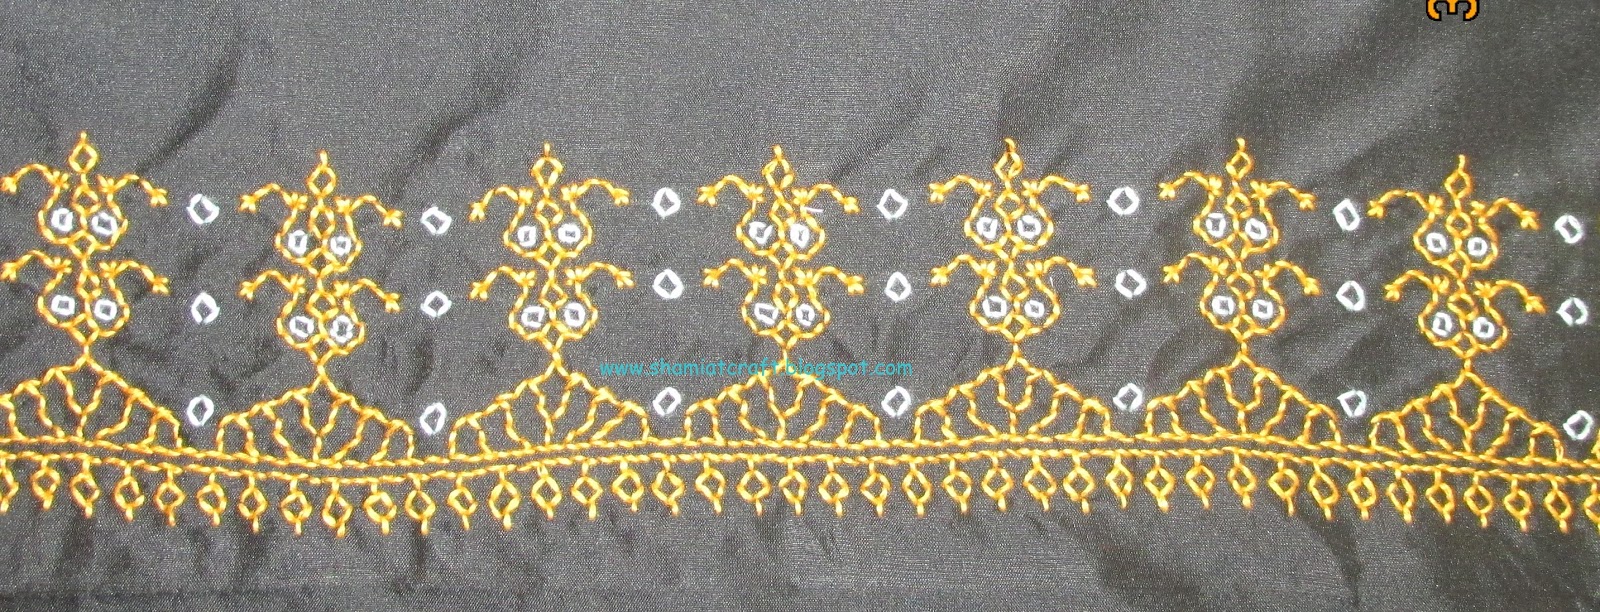
As I have promised in my last post I am here to show the kasuti embroidery yoke and border.  This time I have embroider this in small pieces of fabric so that it can be attached to the main piece.  I have got the kasuti embroidery net from Raja thread stores in chennai but the no of holes per inch is larger than the one which I had earlier.  That's why stitches are somewhat longer.  But it gives perfect look like before.  

Fabric used : Black color silk cotton
Thread used: Anchor embroidery thread
No. of strands: 3
Design taken from: Mridulas school of embroidery - kasuti applications book

Yoke
-------


Border


I have just placed the embroidered pieces on top of the fabric just for an idea how it can be attached to the fabric.

Two years back I have embroidered the same design but with different border.  You can view that piece here.

If any of you is interested in buying this piece do mail me at isseelan@yahoo.com.

Saturday, January 30, 2016

Kasuti tops and a WIP update

This is my second finish for this year.  I have embroidered his kasuti tops. Embroidery is done only for the yoke, border and the border for sleeves.  I have done this upon a request from my co-sis for her colleagues.  I don't know whether they will like it or not.  

I have done this in black color silk cotton material with two strands of anchor embroidery thread.  
Thread no's: Anchor 167 & 306
No of hrs: 19 hrs 

It took more than 1 hr to fix the net and 1 1/2 hrs to remove it after completing the embroidery.


This is the yoke part

This is the border both for the body part and sleeves.


Both yoke and border

I have some more projects to do.  Initially I have got the kasuti net along with the embroidery which I have taken from mridulas school.  Now it's over and I am in need of kasuti net or calico net.  But I don't have any idea from where to get it.  Anyone have any idea?  Do we get the kasuti net around chennai? or anywhere online.  Please do let me know.  Till I get that net I will continue the projects with kutch designs.

You can view my other kasuti projects here.

Now for the update in my mega cross stitch project.  I have completed the page 4 of the harmony cross stitch project.  It took nearly 20hrs to complete this.

Page 4 completed 

Page 1 to page 4

Hope all of you have like my projects.  Do take time to comment on it as it gives me encouragement to do more.  Will come up with some more projects.  So do watch my space.

                                       Smalls SAL - January checkin

Thursday, April 23, 2015

Kasuti Embroidery Yoke and border

Last year I have embroidered 2 kasuti kurtis and was happy with the outcome.  It is very simple but the kurti was looking elegant.  This year I have planned to do embroidery for others and the first one is for my co sister.  I am planning to do this design from the day I have purchased the book from Mridulas and atlast the day arrived on the mid of march.  And yesterday I have completed embroidering it yoke and borders for the sleeves.  

I have used three strands of anchor embroidery thread three colors and used kasuti net to stitch.  Happy that the result is more beautiful than I expected.  Now over to the embroidery.  Click on the image to get a more clear image.


Closeup of the yoke.


Border for the sleeves.


This is how I worked kasuti embroidery with net.  First  I attach the net to the fabric, then do the embroidery and at last I removed the net.


You can view my other kasuti works here.

Now I can concentrate on the embroidery on my saree.   Also trying hardanger and more on zentangling and enjoying doodling.   Will come up with some other FO.  Till then happy embroidering.

Tuesday, March 25, 2014

Kasuti Yoke

kasuti embroidery is the one with geometrical shape. when worked perfectly it gives an elegant look.  I have learned kasuti embroidery through Mridulas school  of embroidery that too thru distance education.  After that i have purchased a book from them which have detailed explanation with the patterns, routes and diagram for churidhar tops.  from the book i have worked one yoke pattern that can be stitched later.  I have worked in a black color silk cotton fabric.

The pattern consists of motifs, filler patterns that altogether forms the shape of a necklace with a pendant.  I have used anchor cotton embroidery floss. Have a look at the work and give  your feedbacks.


Close up of the pendant motif.


one more closeup.

Now I am working on the matching border for this yoke.  I will be back with another post in crochet.  Till then, Happy embroidering.
*/