Showing posts with label Fly stitch flower. Show all posts

Wednesday, July 22, 2026

Flower Embroidery #13 - Fly stitch flower

Welcome back to the Flower Embroidery Series!

I'm delighted to have you here as we continue our floral embroidery journey with the 13th flower design — the Fly Stitch Flower. This simple yet elegant stitch creates soft, delicate petals that add a graceful touch to any embroidery project. Whether you're decorating clothing, home dรฉcor, or accessories, this flower is easy to stitch and beautifully complements the other flowers in this series. Follow the video tutorial below and learn how to create this charming bloom step by step.


VIDEO BELOW ๐Ÿ‘‡๐Ÿ‘‡


Pattern for the design
---------------------
Stitches & Threads used
Petals - Fly stitch - 27 - 3 strands
Centre of flower - Satin stitch - 59 - 3 strands
Leaves - Fishbone stitch - 227 - 3 strands
Stem - Couching stitch - 227 - 3 strands

Congratulations on completing your Fly Stitch Flower! Its delicate petals and elegant shape make it a wonderful addition to your growing collection of embroidered flowers. Keep practicing and combining it with the other flowers you've learned to create unique floral patterns full of color and creativity.

Have a happy time with your needle n thread!

Saturday, November 15, 2025

Flower Embroidery #5 - Fly stitch flower

 Welcome back to the Flower Embroidery Series!

It’s wonderful to have you here as we move on to our fifth design — the Fly Stitch Flower. This stitch is simple, neat, and perfect for creating soft, open petals that give a delicate look to your fabric. Whether you’re adding it to small motifs or using it in clusters, the fly stitch brings a lovely lightness to any embroidery project. Let’s learn this beautiful flower in the video tutorial below and keep your embroidery garden growing! ๐ŸŒผ✨


Pattern for the design
----------------------
Design size is 2.5" * 1.5"

Stitches Used & Thread numbers
-------------------------------
Flower - Fly stitch - 6 strands - 168
Centre of flower - French knot - 6 strands, 1 wrap -  307
Stem - Split back stitch - 3 strands - 258
Leaf - Blanket stitch - 3 strands - 258

Your Fly Stitch Flower is now complete, giving your fabric a gentle and graceful bloom. It’s amazing how such a small stitch can add so much elegance. Keep exploring these simple techniques to build a colorful and creative floral collection.
Have a happy time with your needle n thread! 

Thursday, December 16, 2021

Fly Stitch Flower Border / Simple Embroidery Border

 Hi all

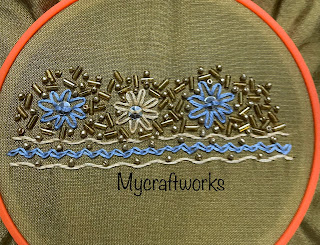
Hope all are doing good and staying safe.  Today I am happy to share with you a simple embroidery border.  I wanted to do a easy but a grand neckline embroidery for a silk saree blouse.  So I have tried this small sample using the basic stitches.  The outcome is perfect and it is beyond my expectation.  Happy to post it here in blog. Let's see the design now.


The fabric I have worked is silk cotton.  When I search google I found that the colour of the fabric is "Old gold".  Then I searched for colour combos with old gold colour and then selected a light shade of gold colour and the contrasting blue.  I was in a doubt whether this blue goes well with the fabric because I am very poor in selecting colour choices.  And to my surprise the blue combo worked very well.  So I thought I will add this colour combo in my colour palatte. 


The design with only embroidery.  It is very plain and simple and then I added the dull gold colour cut glass beads randomly.  It lifted the grandness of the embroidery.  

After adding the cut beads also, I felt something is lacking and then filled the gaps with golden beads.  And the whole outlook of the piece changed.  
The design is complete now.  

You can use this design for border or for the neckline also.  

Pattern for the design

Anchor Threads used :
Light gold - 313 
Blue - 121 

Stitches used
Lines - Laced Running Stitch (3 strands)
Zig Zag line - Zig Zag chain stitch (3 Strands)
Fly stitch flower - 4 strands
Used a sequin in the centre of the flowers.
 
Hope all of you like this design.  Will meet you with another interesting post soon.  Till then, have a nice day.

Friday, August 20, 2021

Mixed stitches embroidery

 Hi all

Hope all are doing well.  Today I am here to show you a small finish which is a WIP  for a long time.   The design has been taken from a kutch embroidery book.  I have started to practice the kutch work motif(I started to do before 5 years - LOL).  But after doing the motif  I felt that I have selected the wrong colour. In the beginning of this year when I was cleaning my cupboard I got this WIP.   I traced two patterns of the same design.  But now I have decided to complete one and I will try to make it into a wall hanging.  

Video tutorial of basic Kutch diamond. 

Now let me show the design.


Some close ups


Herringbone stitch Leaf and flower.  
Only at the time of editing this blog post I realised that I have embroidered the flower using green colour(poor concentration).   Centre of the flowers are done using satin stitch.  The small leaves are also done using satin stitch. Stems are done using stem stitch. 

This is the kutch work motif.  I have used variegated thread here.  I am thinking how to turn this piece into a wall hanging.  Once I complete it I will post it here.  

Hope all of you like this pattern.  I am planning to come up with a simple craft tutorial.  So watch this space.   Till then, have a nice day. 

Linking to:

Thursday, January 5, 2017

Embroidery start up and plans for 2017

Hi all,

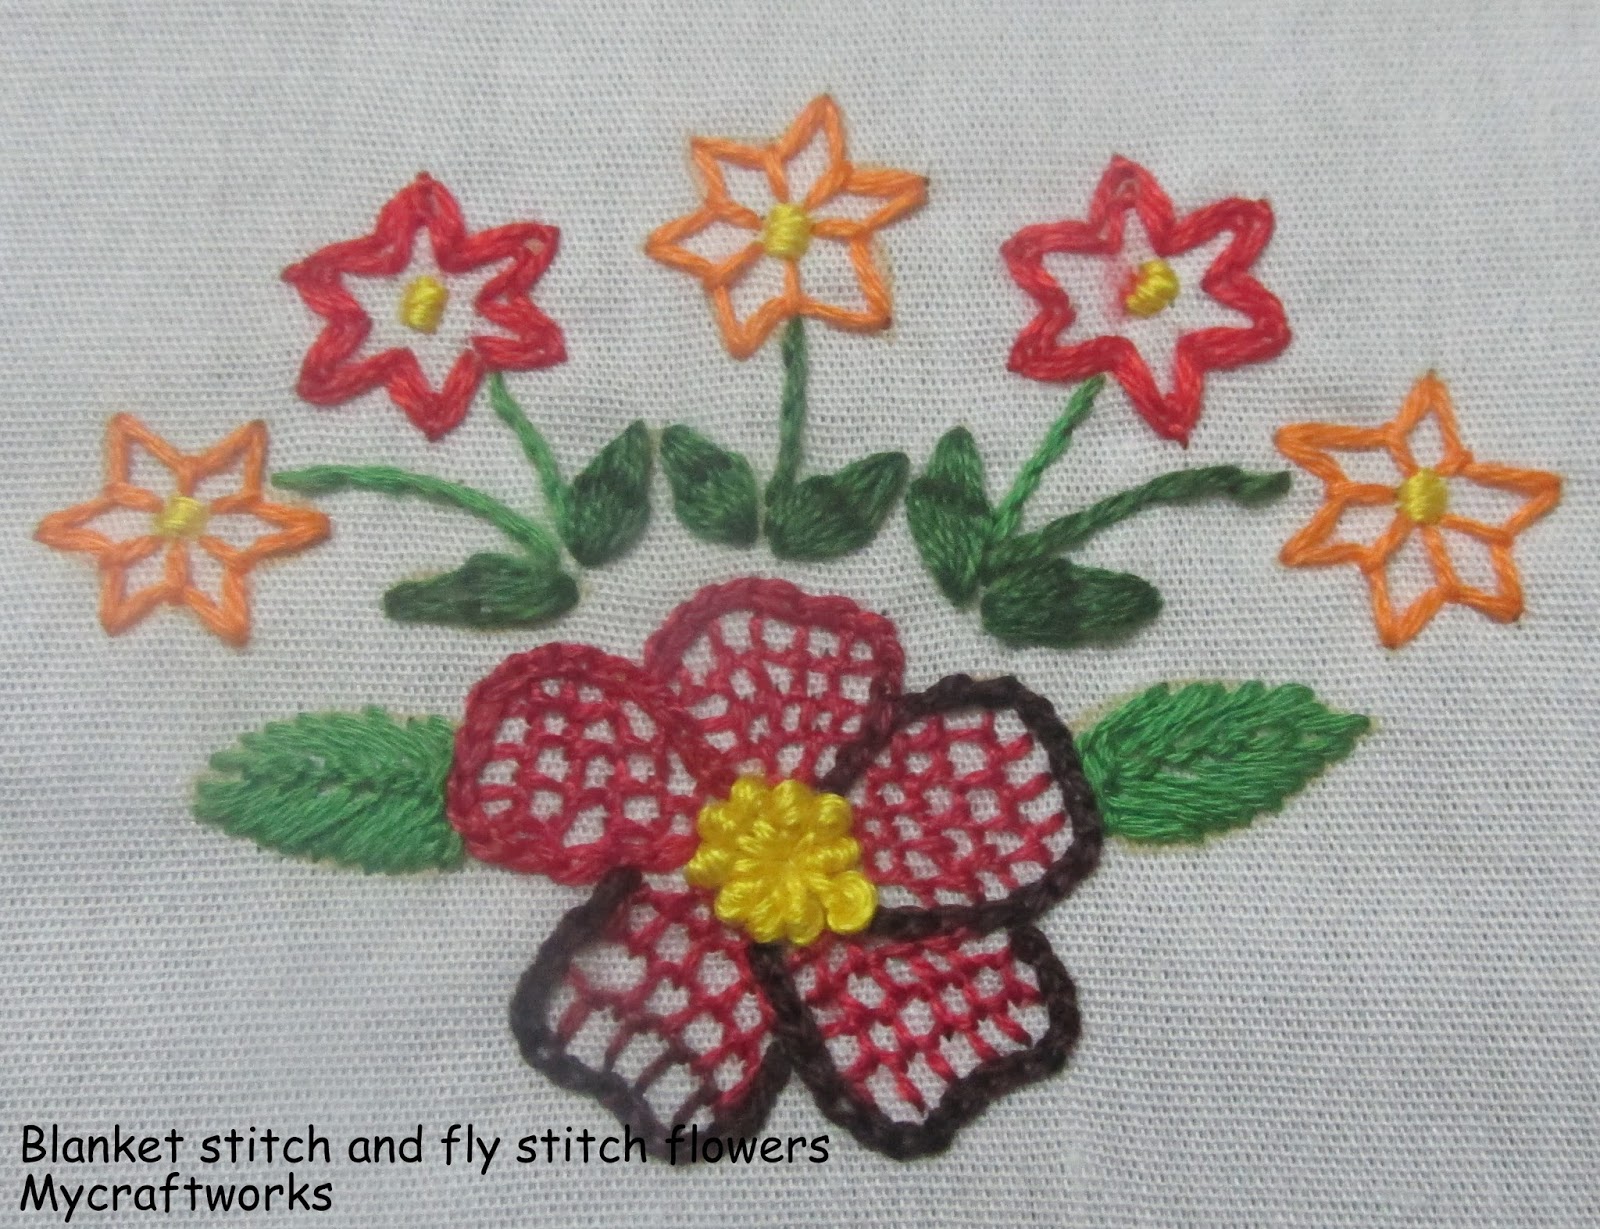
We r in the 5th day of Jan and it looks like the days are running.  I have started up my crafty journey with these two embroidered flowers.  Last year I didn't stitch up any surface embroidery.  I was more into kasuti work and kutch work.  So, to refresh me t have stitched these two designs.  hope all of you like it.


Small flowers are worked in fly stitch.  For all the stitches I used two strands of thread. I will come up with more embridered flowers this year.  I will be finishing these pieces of embroidery as a wall hanging quilt. 

This new year I didn't take any resolutions.  But I have decided to be happy with what I have.  I will try to be patient whatever situations may be and should accept the ups and downs if any with a calm mood.  

On the crafty front, I am continuing with the granny stripe blanket, Mega cross stitch project and the kasuti sampler.  

This year I am participating in the smalls SAL cross stitch.  Last year I was not regular in this SAL.  So this year I have selected the Lucie heaton fairies chart to stitch and framing in the end of the year.  Also, Started to do the rainbow SAL. The borders and the first part are published.  Any of you want to do cross stitching with no color changes often this SAL is for you.  Each block is stitched up in one color.

Apart from these, I have the following plans for 2017.

  1. Finish Praying hands cross stitch(for sale in church)
  2. Needlepoint wall hanging kit
  3. Long stitch kit (These two kits are with me for a long time)
  4. Kasuti embroidery kurti
  5. Embroidered saree(Planning to do with kantha embroidery motifs)
  6. 5 crochet bags and 5 purses(interlocking crochet)(for sale in church)
  7. Practice long and short stitch(L&S) and finish atleast one small project using L&S
All these project will take time and if I get bored I will be stitching small motifs or flowers or practice designs in any new forms of embroidery(like hardanger, needlepoint).

I have some more small designs and a big finishes to show you from last years crafty journey.  Will come back with the embroidered patches.  Till then happy crafting.

Saturday, October 26, 2013

Kamal Kadai Flower

Long back I started to embroider a saree  and finished the three borders.  Now I am working on the pallu and the body part.  I used Kamal Kadai work for the flowers.  This is the design I have worked on the pallu part.  Center of the flower has to be embellished with sequins or beads.  I have a post regarding the border design here.

 
Since it is a plain chiffon saree the body part was very plain. So I decided to add sequins at regular intervals.  Then also it was not up to the mark.  Then I have made fly stitches around the sequin and it has taken the shape of a star and I am doing that star shape flower with sequin all over the body and that flower is here:
 

I am happy about the star shape and what about u?  I am planning to complete the saree within a week and I will be back with the completed saree in my coming post.  Till then, Happy embroidering.
*/