Hi all,
Hope all are doing good. Three days back I have conducted a game to guess a stitch. But there was a problem in posting the answers. One of my friend told that she was not able to type in the text box of the contact form. And some said they have send the answers but I didn't receive it in my mail. On the whole I came to know that the contact form was not working properly from a remote system other than mine. But 4 to 5 of them those who had personal contact with me through the mail they guessed the stitch. For those who guessed the stitch I have send the e-book to their mail. If any of you are willing to get the e-book please do leave a comment in the comments section.
The name of the stitch is "LONG TAILED DAISY".
This stitch is an embroidery stitch for the beginners. A variation of lazy daisy i.e) Lazy daisy stitch with a long tail is long tailed daisy stitch. Let me show how to work the long tailed daisy stitch and a flower out it. Also I have shown how to stitch a leaf out of that stitch. Long tailed daisy can also be used to form the petal of a flower.
Click Here for the Video Tutorial
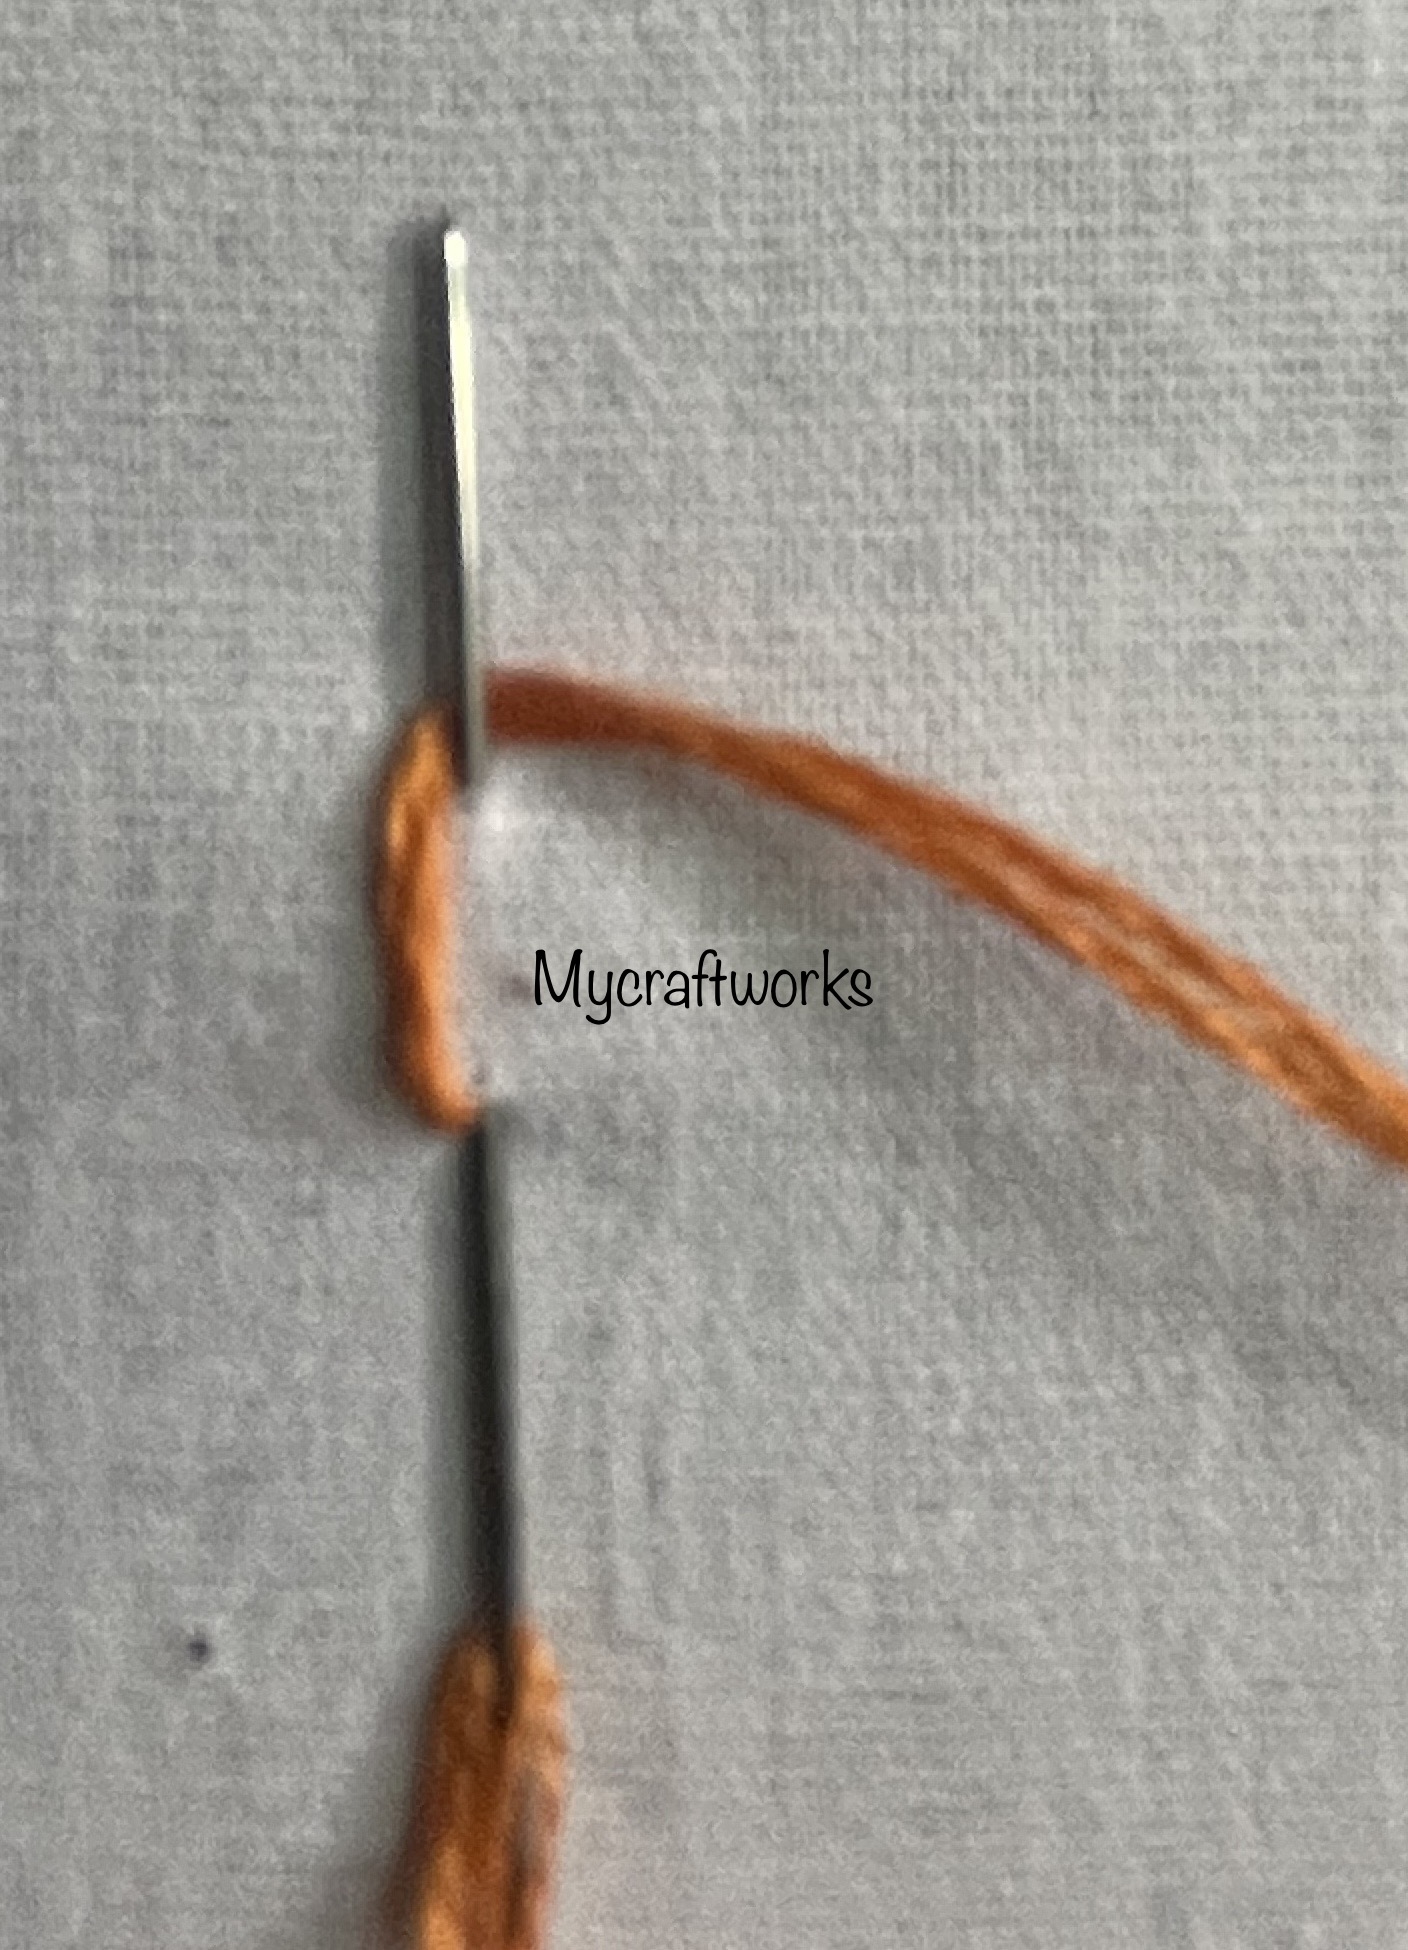
How to work long tailed daisy?
Take the needle out through the fabric. Insert the needle in the same place and pick a small amount of fabric upwards as we do for chain stitch and lazy daisy stitch.


Bring the thread over the needle and pull the needle through the fabric. A chain is formed like this.
Now anchor the thread a little above the stitch formed forming a tail. A long tailed Daisy stitch is formed.
How to work a long tailed daisy flower and leaf?
Now let us see how to work long tailed daisy stitch to form a flower and leaf. Here I have worked the stitch in a circle. From the outer edge of the circle I have made the stitch next to each other with the tail anchored around the circle in the centre.
Now draw a leaf shape. First stitch a long tailed daisy in the centre i.e) start from one end and anchor at the opposite end.
Now stitch the second stitch to the left or right of the first stitch. I have stitched it to the left. Start from near the first one and anchor the tail exactly at the first anchoring point. Then stitch the third stitch to the right of the first stitch with the tail anchor at the same place. A leaf like structure is formed .
Hope the tutorial is clear. I will be back with a simple design to practice the stitch. Til then have a nice day.


I am sorry to hear about the trouble with your contact box. Often something that works for us on our OWN host blog can malfunction for visitors.
ReplyDeleteThe Long Tailed Daisy Stitch is such a beautiful stitch, as well as easy to do. It can also be combined with other stitches or beads to form fantastic flowers.