Hi all
Hope all are doing well and good. In the embroidery stitch tutorial series next is Arrow Head stitch. This is a simple stitch that belongs to the family of straight stitches. I am working on a neck design that incorporates this stitch. So I have chosen the tutorial for arrow head stitch today.
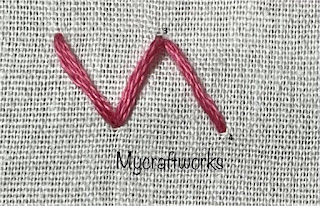
Arrow head stitch can be done horizontally and vertically. Straights stitches are done to form an arrow shape. When two or more rows of arrow stitch is worked horizontally it looks like a zig zag stitch. They form a neat and simple border or necklines for dresses.
First let us see the working of the arrow head stitch horizontally.
Do a straight stitch from 1 to 2.
Make the next straight stitch from 3 to 4. An arrow head stitch is formed.
Make the next stitch from 3 to 4
Make the next straight stitch from 5 to 4 to complete the next arrow head stitch. continue in this way along the stitch line.
Arrow Head stitches horizontally.
For the vertical arrow head stitch follow the numbers in the following picture.
Make straight stitches from
1-2
3-2
4-5
6-4
and continue along the stitch line.
Video tutorial for this stitch. Click the following link
Hope this tutorial is helpful. I am working on a neck design using this stitch and mirror work. Will post it soon. So stay tuned and follow my blog to get all the updates.
Have a nice day.
This post has been linked to the following blog parties


Although I like this stitch, it does use up a lot of thread.
ReplyDeleteThis comment has been removed by a blog administrator.
ReplyDeleteThis comment has been removed by a blog administrator.
ReplyDelete