Monday, May 31, 2021

Blog Awards

 Hi all

Hope all are staying safe and doing good.  Last week I was reading the blog post of Queeniepatch, I was surprised that she had nominated me for a blog award.  

Queenie's blog is a stitch dictionary and you can see so many interesting projects related to quilting and different forms of embroidery.  She has been a big dose of inspiration to me and with her sweet words she encourages me to do more.  

I have to answer some questions for the awards.

What would my perfect holiday be?

My perfect holiday is taking a break from my dailychores.  I don't cook on those days which gives me a holiday feeling.  Apart from that my perfect holiday destination is Kodaikanal a hill station in TamilNadu, India.  


Where is my favourite place to walk?
My favourite place to walk is the path way in the beach road in our city.


What inspired to me start a blog?
I Started this blog to record my embroidery journey.  After that explored lots and lots about different types of embroidery, crochet, quilting etc.  This blog is the one that keeps me motivated whenever I am down.  Whenever I look back this blog gives me a sense of satisfaction. 

What did I miss most during lockdown? 
I missed our weekend shoppings and eat out.   Because of lockdown I was not able to visit my parents and that let's me down often.  Hope everything will be back in normal soon.

What was the last book I read?

This is the book I read last and few more pages left to finish the book.  I love to read books in my mother tongue Tamil.  This is the tamil translation of the book "How to stop worrying and start living" by Dale carnagie.  I have read Dale carnagie's book How to enjoy your life and your job in english. I liked it and after that came across the tamil translations of his books and bought all his books.  Other than this I love to flip the pages of embroidery magazines and craft books.  It gives immense happiness to me.

Thank You Queenie for nominating me. 

Now it's my turn to nominate three bloggers.  

  
These blogs are really inspiring me everyday.  Reading blogs is really like visiting our friends. Thanks to the blogging world. 

Sunday, May 30, 2021

Mandala Colouring - 2, Doodling

 Hi all

Hope all are staying safe.  In this pandemic situation we are in strict lockdown and my only relaxation is colouring and doodling.  I haven't started to do embroidery after the hurt in my fingers.  I am feeling better day by day and hopefully start to do embroidery soon.  

This is the second page in mandala colouring.  I have done the colouring with ordinary sketch pens only.  This colouring page is from the book Refreshing mandala, a colouring book for adults. 

You can see the first colouring page here and colouring books I own here. .  

Also you can purchase the books from the  links available in the top of this post.

This is a closeup of the design.


Apart from colouring I love to doodle.  This is a doodle page which I have done long back.  I am working on a zentangle pattern similar to this. Will post it soon.  I am not able to capture a good picture of this.   Click the image to see a better one.  You can see my other doodles here.

Hope all of you like these colouring pages.  Do try colouring and be relaxed.  Will be back with another interesting post.  Have a nice day.

Friday, May 28, 2021

Inspirational quotes

 Hi all

Hope all are doing well and good. I am trying to cope up with what life brings unexpectedly. I am trying hard to keep me in a positive mode. To get some instant satisfaction I have decided to try something which I have not tried till now. I used to write quotes now and then in my journal. 

But this time I have tried watercolour background to pen down the quote. This month I have learned a big lesson that is to be calm in every situation.  So I have pen down this quote. 

Instead of using a plain background I used watercolours.  This is my first try with water colours.  First I tried it with different shades of pink and the color blending is not visible.   Then used the micron pen to write the words.  I have tried a basic calligraphy technique here.  Just written down the words using cursive writing and make the downstroke places a little bold.  It gives a decent looking font for these quotes.

Inspirations quote - Be calm

For the second one I have used pink, red, orange and yellow watercolours.   I think the background is ok.  
Inspirational quote

Hope all of you like this.   Do drop in your feedbacks in the comments section.  It will encourage me to do more.  

I will be back with another colouring page.  Have a nice day.  Stay home and stay safe.  


Monday, May 24, 2021

Mandala Colouring - 1 / Adult colouring books

Hi all 

Hope are doing well and staying safe.  Today I am happy to share with yon all a colouring page which I have completed recently.  Why no embroidery? and why go for colouring?  Last year during the lockdown I had purchased some adult colouring books.  But busy with the family and embroidery, I was not able to take up the colouring book.  

This year is also the same, busy with family and blog.  In my free time I used to design patterns for the embroidery stitches and also busy with the WIP's which I have in my basket.  They are all related with needle and thread.  I have many patterns ready to stitch.  But unfortunately my index finger in the right hand got badly hit between the door and the door frame.  By God's grace we were able to get the appointment of the doctor immediately and got the treatment with 3 stitches and a big bandage.  So for the past one week I was not able to do any embroidery. 

 It was very boring and then I took my colouring book and started to colour a page with my thumb and middle finger. And this is what I have finished after 5 days of colouring.  I used ordinary sketch pens to do the colouring.  So onto the colouring page now.


These are the two colouring books I have purchased last year through amazon.  If you need you can purchase the books through the following links.
There are totally five books in this series.  The Price is very reasonable so that everyone can afford it.  The paper quality is also good. But  Always I used to keep a thick cardstock paper below the colouring page so that the ink of sketch or pens doesn't bleed into the next pages accidentally.

Hope You all like this colouring page.  I am halfway through the second page.  Will post once done.  Hopefully on Friday I will be posting my embroidery stitch design. Till then, have a nice day.

I am joining the link party at

Thursday, May 20, 2021

Kasuti embroidery kurti's - A round up

 Hi all

Hope all are doing well and good.  I am very happy to share with you all my kasuti embroidery kurti's which I have done so far.  I wanted them all in one place to see and so  this blog post.  In future new embroideries will be added to this page.  This is a picture heavy post.  You can click the particular links to view the details.  

Click here to view the details


Click here to view the details

Click here to view the details

Click here to view the details

Click here to view the details


Click here to view the details

Hope all of you like the embroidered kurtis.  Do drop in your feedbacks in the comments section.  Will update this page when new embroideries are done.  Thank you and have a nice day.

Monday, May 17, 2021

Hairdo embroidery / How to embroidery hair?


 Hi all

Hope all are doing well. I was not able to post regularly  in the past week. Hopefully hereafter I will be able to post everyday. 

Today I am very happy to share with you a simple hairdo embroidery. 


To do this you should be able to do the knot at the end of the thread.  Then you have to cut the thread at a particular length and that’s all. Let’s see the steps one by one. 

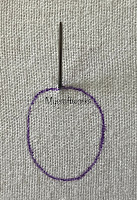
Draw a shape that looks like oval for the head. It is not oval and not circle. 

Here I have used anchor thread number 310 with 6 strands.   Take a long thread and put a knot in the end. 


Start from top or bottom.   Bring the thread up through the fabric. 

Leave a length of thread that is needed for the hair. And cut at that point.  

Again make a knot at the end of the thread and do the same step again near the first point.   I have attached a pin to know the length of the hair.   Continue in this way till the whole circle is covered with threads.


Now bring all the thread in one direction as shown.  It is not a problem if the threads are of uneven length.   Now with a comb slightly comb the threads.  

Now take a stitch near the lower end of the circle drawn and end that stitch at the other end.  Pull the thread tight and take one more stitch like that.   A simple hair do is completed.
 

To add more beauty I have added three french knots.  To do that bring the needle in the middle of the straight stitch above the stitch line.  Wrap the thread twice around the needle and insert the needle in between the two stitch lines to anchor the french knot.  


Add two more french knots on either side.   Comb the threads in the downward portion and trim it equally.  That's it.  Hairdo is done. 

Hope all of you like this simple tutorial and hope I have made it clear to everyone of you.  Will come up with more hairdo's.  

I am linking this post to

Friday, May 14, 2021

Embroidery Stitch Tutorial - Eyelet Stitch

Hi all 

Hope all are doing well.  Today I am going to share with you the tutorial for doing the Eyelet stitch.  You can see eyelet stitch in this Straight stitch family mandala. It comes under the family of straight stitches.  

To start with draw a circle.  I have drawn circle number 14 from circle protractor.  Used 3 strands of thread.  If your circle is big you can increase the number of strands.  Mark the centre of the circle.  

                                      Punch the centre and make a hole with a nail of thick needle.

Bring the needle up through the fabric on any one point on the circle.

Insert the needle through the hole in the middle.   The first stitch is made.

Again bring the needle near the first stitch on the stitch circle and insert through the hole and continue the steps.
 

While pulling the thread through the fabric hold the already stitched stitches and pull through.  The new stitch will sit nicely on the right of the already stitched ones.

After filling half of the circle.

A completed eyelet stitch.

While anchoring the thread on the back side be careful not to cross the hole.  If the hold is big the thread will be seen on the right side which will hide the eyelet.  

I hope this tutorial is useful to you.  Have a nice time with your needle and thread. 


Kutchwork Kurti update - Sleeves completed

 Hi all 

Hope all are doing well.  Last year I got 4 kurti kits from shreepathi design studio.  They have the fabric with the design trace - design in neck and sleeves.  Threads, needles and an outline of the design with the thread colors.  I have completed two of them - 2 kasuti kits.  Started the third one which is kutch work.  And completed the sleeves. 

Kutch work kurti sleeves

They haven't instructed the stitch for the round blue colour round portions.  First I thought of stitching mirrors in it.  But I don't have mirror the fits the size of those circle.  They are small than the mirrors I have.  So I have stitched the Eyelet stitch to fill in those circles and it was perfect. 


For the small portion of the leaves and stems I have used back stitch.  All through the design 3 strands of anchor threads are used.  

Kutch work kurti sleeves


Today I have started to do the neck portion.  Hopefully within a week I will be able to completed it.  So the next update will be the finished neckline.  Drop in your feedbacks in the comments sections.  I will be happy to hear from you. 
*/